Hypertext Links
Overview
A hypertext link is a clickable element within the body of a web page that can either open another document or take to you to a different location within the current web page. If the link opens another document, that document may be part of your own website or reside in another domain entirely, anywhere in the world. Hypertext links are what makes the Web such a powerful information retrieval tool.
A hypertext link usually contains the Uniform Resource Locator (URL) for a specific Internet resource. An absolute URL consists of a scheme identifier (e.g. "http"), followed by a domain name (e.g. "www.technologyuk.net"), and the path information for the file in which the resource resides. A typical absolute URL (the URL for this page, in fact) is shown below (note the placement of the colon, forward slash, and period separators).
http://www.technologyuk.net/website-development/html-basics/hypertext-links.shtml
The above link points to a file called hypertext-links.shtml (this file), which lives in a directory called html-basics, which is a subdirectory of another directory called website-development, which is itself a subdirectory of the root directory of the domain technologyuk.net. Essentially, the more deeply nested a document is within the directory structure of a website, the longer the absolute URL for that document will be.
Fortunately, we usually only need to use absolute URLs when we are creating hypertext links to documents on a remote server. For linking to documents on our own website, we can use either relative or absolute pathnames which are usually much shorter (we will be discussing relative and absolute pathnames shortly).
Hypertext links can point to any kind of Internet resource, including HTML documents, image and sound files, video archives, and animation files. They can also be used to indirectly access live data streams. A link is created within a HTML document using the <a> ... </a> tag set (the 'a' in this case refers to the anchor element). In most cases, the term "anchor" is probably not a particularly appropriate name for the links we create to other documents. Most people simply call them "links" or "hyperlinks".
In fact, to link to the home page of another website, we (usually) don't need to include any path or filename information in the URL. Almost all websites have a default document file in their root directory that will be displayed automatically when the website is accessed using a URL consisting only of the scheme identifier and domain name. The following link, for example, would take you to this website's home page:
<a href="http://www.technologyuk.net">Visit TechnologyUK.net!</a>
The href attribute is used to specify the URL of the target document (href is a contraction of hypertext reference, as you may already have guessed). There are a number of other attributes that we can use with the anchor element, and we will be looking at some of the more important ones in due course.
The root directory of www.technologyuk.net contains a file called index.shtml, which is the name of the default document in the root directory (and in each subdirectory of the root directory) on our web server. The default document is the document that will be served to the client computer by the web server if no filename is specified by the hypertext link.
Note that the name of the default document can vary, depending on what kind of web server software is running on the server. Note also that the server administrator can change the name of the default document if they wish by making the necessary changes to the server's configuration file.
Hypertext links can be used to create menus that allow a user to navigate from one page to another within the local web directory structure, or to access web pages on a remote server, or to open media resources such as a video clips, audio tracks or portable document format (PDF) files using an appropriate plug-in. Such media resources can be located on the local server, or they might live on a remote server in another part of the world.
When hypertext links are used to navigate from one document to another within the same website, the default behaviour is for the document that is the target of the link to replace the document that contains the link in the browser window. A link that opens a page on another website, on the other hand, will often specify that the target document should open in a separate browser window to ensure that the web page hosting the link remains active.
Links to media files will be handled on a case-by-case basis, depending on the precise nature of the linked-to media file. Movie clips, audio tracks and animations may be embedded within the current page, or they may appear in a separate pop-up media player or viewer (we will be looking at this subject in more detail elsewhere).
We can also use hypertext links to navigate from place to place within a single web page. This is particularly useful if we have a web page that contains a large amount of information and covers a significant number of related topics. Internal links make it easy for the user to jump to a particular section, or to return to the page index so that they can make another choice.
Creating linked pages
Probably the best way to see how hypertext links work is to actually create some hypertext links. We will create two simple web pages, each of which contains a link to the other. The following HTML code creates a page that displays the first two verses of the well-known poem "Daffodils" by William Wordsworth:
<!doctype html>
<html lang="en">
<head>
<meta charset="utf-8">
<title>Link Demo 1</title>
</head>
<body>
<h1>Link Demo 1</h1>
<h2>Daffodils - William Wordsworth</h2>
<p><strong>Part 1</strong></p>
<p>
I wandered lonely as a cloud<br>
That floats on high o'er vales and hills,<br>
When all at once I saw a crowd,<br>
A host, of golden daffodils;<br>
Beside the lake, beneath the trees,<br>
Fluttering and dancing in the breeze.<br>
</p>
<p>
Continuous as the stars that shine<br>
And twinkle on the milky way,<br>
They stretched in never-ending line<br>
Along the margin of a bay:<br>
Ten thousand saw I at a glance,<br>
Tossing their heads in sprightly dance.<br>
</p>
<a href="link-demo-02.html">Go to part 2</a>
</body>
</html>
Copy and paste this code into a new file in your HTML editor, save the file as link-demo-01.html, and open the file in a web browser. You should see something like the following:
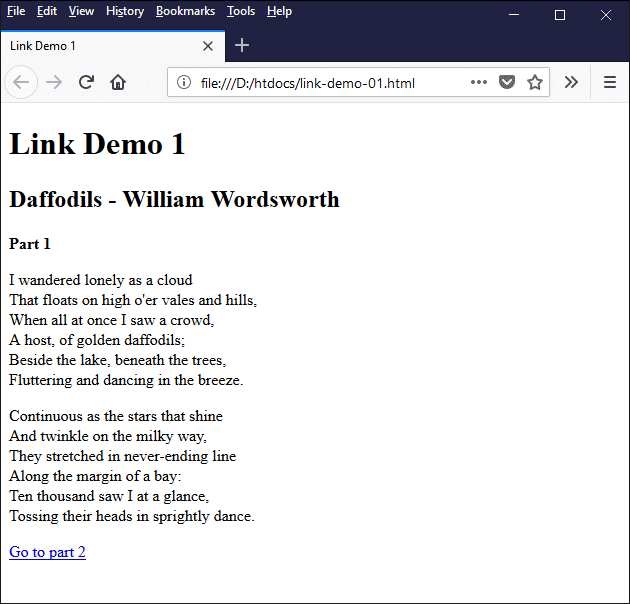
A web page with a basic text link
The last line of HTML code before the closing </body> tag creates a simple hypertext link to a file called link-demo-02-html, as shown here:
<a href="link-demo-02.html">Go to part 2</a>
The value of the href attribute is set to the URL of the target file link-demo-02-html. Because we will be creating this file in the same directory as link-demo-01-html (i.e. our htdocs directory), we do not have to include any path information in the URL, just the filename itself. The text that appears between the opening and closing anchor tags is called the link text, and is the only part of the link element that is actually visible.
By default, the link text is underlined and will initially be displayed as blue text. This is done to draw the user's attention to the fact that the text is a link. Once a link has been clicked on (and assuming you have not cleared the browser cache), the colour of the link usually changes to purple to indicate that the link has already been visited.
As with all HTML elements, it is possible to change the styling of an anchor element's link text (for example by removing the underlining or displaying the text in an alternative colour), but this should be done with care. We don't want to obscure the fact that the text is a link.
If you move the mouse over the link text, you should see the mouse pointer change from an arrow to a hand symbol, as shown below. This is a default browser behaviour intended to draw the user's attention to the fact that the text is a link. If you look at the bottom left-hand part of the browser window, you should also see the URL of the target document (or in this case the file path, since your files are not yet on a live web server).
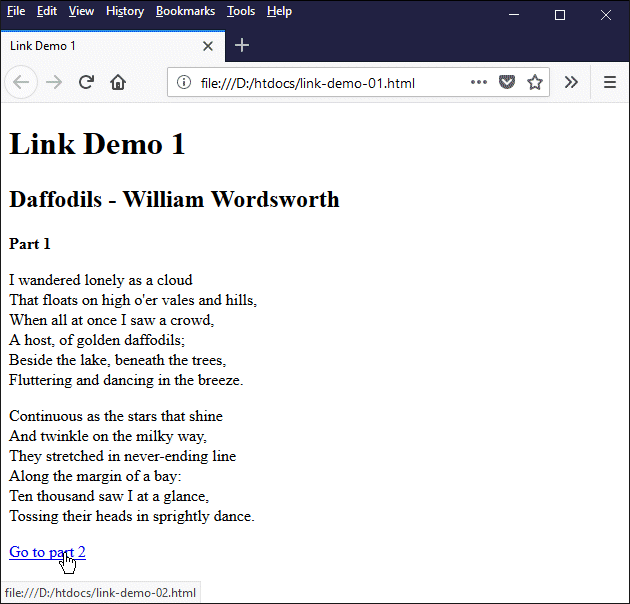
If you move the mouse over a link the mouse pointer changes to a hand
Clicking on the link at the moment would result in the browser telling us that it can't find the file link-demo-02.html, which is not surprising since we haven't actually created the file yet. Nevertheless, feel free to click on the link anyway to see what happens. You will probably see something like the illustration below.
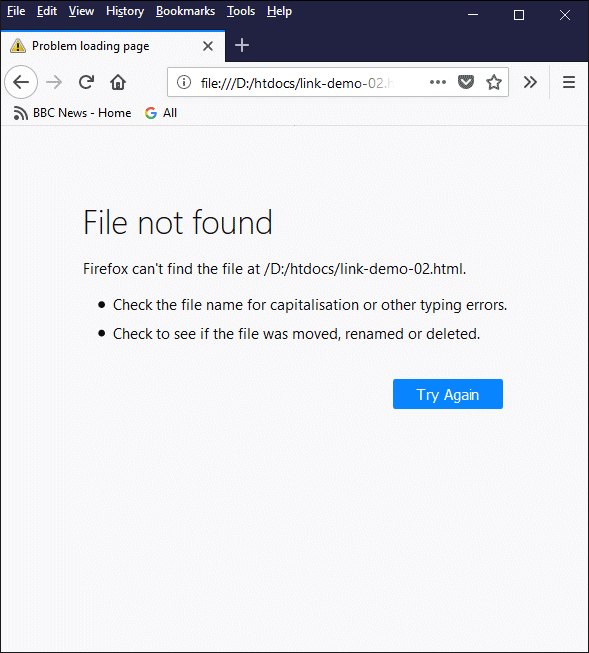
The browser will inform you that it cannot find the file link-demo-02.html
Let's create the second page, which will include a link to the first. The HTML code below creates a page that displays the final two verses of William Wordsworth's poem "Daffodils".
<!doctype html>
<html lang="en">
<head>
<meta charset="utf-8">
<title>Link Demo 2</title>
</head>
<body>
<h1>Link Demo 2</h1>
<h2>Daffodils - William Wordsworth</h2>
<p><strong>Part 2</strong></p>
<p>
The waves beside them danced; but they<br>
Out-did the sparkling waves in glee:<br>
A poet could not but be gay,<br>
In such a jocund company:<br>
I gazed—and gazed—but little thought<br>
What wealth the show to me had brought:<br>
</p>
<p>
For oft, when on my couch I lie<br>
In vacant or in pensive mood,<br>
They flash upon that inward eye<br>
Which is the bliss of solitude;<br>
And then my heart with pleasure fills,<br>
And dances with the daffodils.<br>
</p>
<a href="link-demo-01.html">Go to part 1</a>
</body>
</html>
Copy and paste this code into a new file in your HTML editor, save the file as link-demo-02.html, and open the file in a web browser. You should see something like the following:
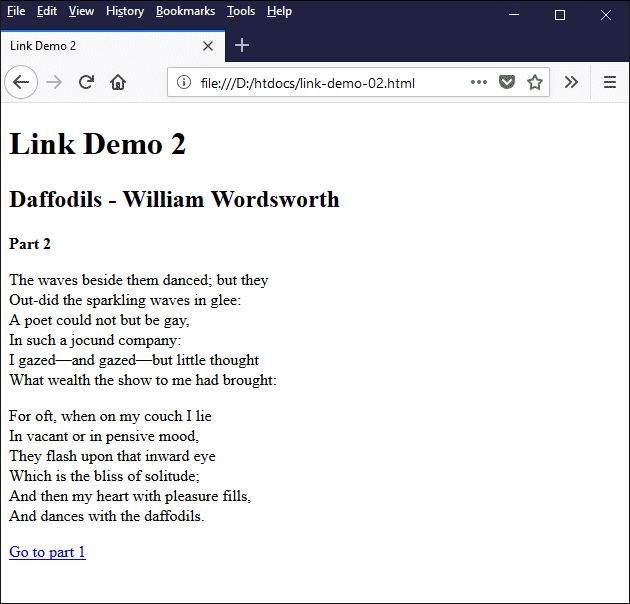
The second web page links back to the first
Clicking the link on this second page should take you to the first page once more. If you click on the link on the first page, the browser will display the second page again. Click on the links a few times to satisfy yourself that everything is working as expected. Most web sites, of course, will consist of more than just two pages. We shall see in due course how to implement a somewhat more sophisticated navigation scheme.
Absolute and relative paths
We have saved all of our HTML documents in a single directory (htdocs) which we can consider to be the root directory of our (so far) imaginary website. You can probably appreciate, however, that if we are going to build a website consisting of dozens, or even hundreds of pages, we will probably not want to store all of our HTML documents in the root directory, because if we do it's going to get very cluttered. Consider the illustration below.
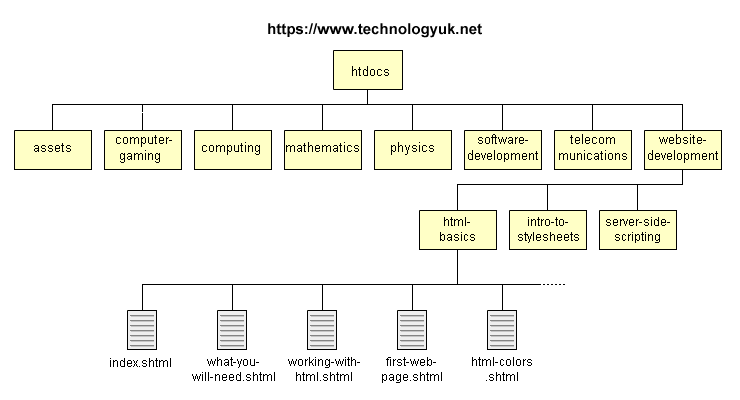
A simplified version of the technologyuk.net website directory structure
The diagram shows a simplified view of the top-level directories of this website. We have expanded the view of the website-development directory to include its sub-directories. We have further expanded the html-basics sub-directory to include some of the files it contains, including its default document (index.shtml).
The website-development directory is the container for all of the files and sub-directories that make up the "Website Development" section. Similarly, the html-basics sub-directory is the container for all the files and sub-directories that make up the "HTML Basics" section, which is a sub-section of "Website Development".
What are the navigational requirements for the HTML files in the html-basics sub-directory? It is always a good idea to be able to navigate to the home page from anywhere on your site, so a link to the home page should be included. And, since "HTML Basics" is a sub-section of "Website Development", we should include a link to the index page of the parent directory.
Navigating a website is a little bit like dipping into a text book to find the information you require, except that finding information in a website is usually easier than finding information in a text book because there is a menu on every page that gives us instant access to every other page at a particular level. Every page in the "HTML Basics" section, for example, has a link to every other page in the section, in addition to the links to the home page and the parent directory.
Let's see how all this looks on the actual website. The illustration below shows a partial screenshot of the index page for the "HTML Basics" section. As you can see, there is a link to the website's home page, a link to the index page of the "Website Development" section, and links to the other pages in the "HTML Basics" section.
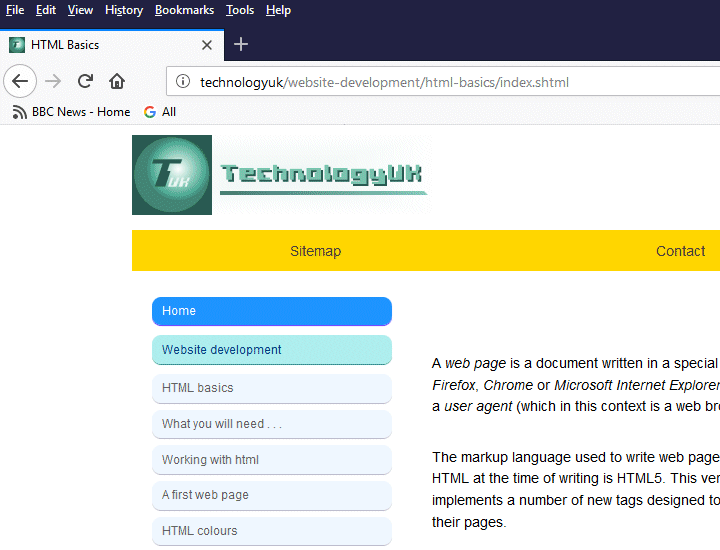
A partial screenshot of the "HTML Basics" index page
We now come to the question of what kind of URLs we should use in our links. We certainly don't need to use any absolute URLs, since all of the documents we are linking to in our navigation scheme belong to the same website and must therefore exist somewhere within its internal directory structure. We therefore have the choice of using an absolute path or a relative path.
An absolute path (sometimes called a root-relative path) gives the location of a file within your website's directory structure that does not depend on the location of the HTML file referencing it. It specifies the complete path to the target file from the root directory of the website and includes each subdirectory that lies directly between the root directory and the target. A relative path gives the location of a file relative to the location of the HTML file referencing it. Consider the illustration below.
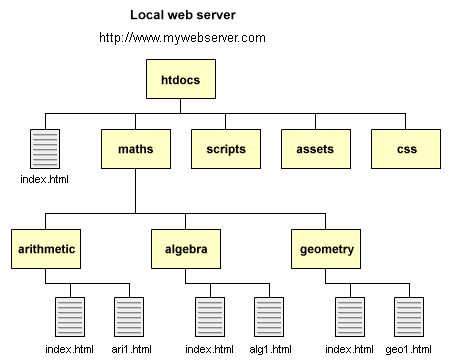
A typical website directory structure
Suppose we wish to create a link from the website's home page (index.html in the root directory htdocs) to the default document (index.html) file in the arithmetic directory (we will assume that index.html will be the name of the default document in all subdirectories). There are four possible ways to create the link without using an absolute URL:
<a href="/maths/arithmetic/index.html">Arithmetic</a>
<a href="/maths/arithmetic/">Arithmetic</a>
<a href="maths/arithmetic/index.html">Arithmetic</a>
<a href="maths/arithmetic/">Arithmetic</a>
The first two examples both use absolute path references because they include the solidus (forward slash) at the beginning of the path reference which is interpreted as the website's root directory by the web server software. The first example adds the default document's filename, but this is not really necessary. The second example will work just as well.
The last two examples both use relative path references because they do not include the solidus. The URL starts with the name of the maths directory, which is a subdirectory of htdocs (which is where we are linking from). Once again, the default document's filename may be included but the link will work just as well if the filename is omitted.
Note that, whether we use an absolute path reference or a relative path reference, a solidus must always be used between the directory names in the path, and between the last directory name in the path and the filename (if included). Note also that using absolute pathnames and omitting the name of the default file will not work in your computer's local file system. These features only work on a live web server.
If we wish to create a link from the website's home page to the document geo1.html in the geometry directory, we must use the target document's filename in the URL, whether we use an absolute path reference or a relative path reference:
<a href="/maths/geometry/geo1.html">Geometry 1</a>
<a href="maths/geometry/geo1.html">Geometry 1</a>
Now let's suppose we want to create a link in the document geo1.html in the geometry directory that opens the document ari1.html in the arithmetic directory. Once again, we can use an absolute path reference or a relative path reference:
<a href="/maths/arithmetic/ari1.html">Arithmetic 1</a>
<a href="../maths/geometry/ari1.html">Arithmetic 1</a>
In the first example, we use the same notation we have seen before, where the leading solidus in the pathname represents the website's root directory. In the second example, we use the double-dot notation to signify that we need to go up one directory before we can point to other directories at the same level in the directory tree.
The simplest kind of hypertext link is one that points to another file in the same directory using a relative pathname. Implementing this kind of link is a trivial exercise, since the URL will consist of just the filename of the target document. If an absolute pathname is used, the length of the URL will depend on how deeply nested the current directory is within the website's directory structure.
The technologyuk.net home page is the default document in the root directory, and provides links to the site's major sections (Computing, Software Development etc.) Other documents in the root directory contain information pertaining to the entire website, like the sitemap, privacy policy, and a list of links to other sites.
Each major section of technologyuk.net has its own directory, which is a subdirectory of the root directory. The link from the home page to the default document in the Mathematics section can thus be formulated as follows:
<a href="/mathematics/index.shtml">Mathematics</a>
<a href="/mathematics/">Mathematics</a>
<a href="mathematics/index.shtml">Mathematics</a>
<a href="mathematics/">Mathematics</a>
All of the above links point to the same file on the server. The first two examples both use absolute pathnames; the only difference is that the second example omits the filename. This is OK, because we are linking to the default document in the mathematics directory (to link to any other document, in this directory, we would need to include the filename). The last two examples both use relative pathnames (the leading solidus is omitted from the URL). Again, the only difference is the omission of the filename in the last example.
Each major section of technologyuk.net has a number of sub-sections. The Mathematics section, for example, includes the sub-sections Arithmetic, Algebra, Geometry and Trigonometry. Each HTML document within a particular subsection will include a list of links to the other pages in the sub-section, as well as a link back to the section's default document and a link the technologyuk.net home page.
Suppose we want to create a link from one of the pages in the Algebra section to the page "Completing the Square" (which is also in the Algebra section). The options are shown below.
<a href="/mathematics/algebra/ completing-the-square.shtml">Completing the square</a>
<a href="completing-the-square.shtml">Completing the square</a>
The first example uses an absolute pathname to specify the URL, and includes the leading solidus indicating the root directory, followed by the full directory path from the root and the filename. The second example uses a relative pathname to specify the URL which, since the target document is in the same directory as the document containing the link, is simply the target document's filename.
Should you use absolute or relative pathnames in your local hypertext links? And should you include the filename for the default document in a particular directory? There does not seem to be an overall consensus on which approach is considered to be best practice.
Using relative pathnames and omitting default filenames usually results in shorter URLs, which obviously means less typing. On the other hand, if a file containing a link is moved to a different directory for some reason, using an absolute pathname will ensure that the link's URL remains valid. According to some sources, there are also benefits associated with the use of absolute pathnames from an SEO (search engine optimisation) perspective.
The decision whether or not to use absolute or relative pathnames in your URLs is dependent to a large extent on the size of your website in terms of the number of files and directories it contains, and on the structure of your directory hierarchy. The navigation scheme within this website has been constructed (for the most part) using absolute pathnames that include default document filenames. We do not present this approach as an exemplar, but it seems to work.
Site navigation
Unless your website consists of a single page (which does sometimes happen, although it is very rare), you will need to have links on each page of your website to enable a user to navigate from one page to another. If your website is relatively small (i.e. only a few pages in total), each page may contain a link to every other page without making the things look too cluttered. For larger websites, you will need to put some thought into planning your site's navigation scheme.
For a website of any size, content will tend to be organised into a number of general categories. Each category may be further broken down into a number of sub-categories, and so on. The result is usually a hierarchical structure that will to a large extent determine both your website's underlying directory structure and the structure of your navigational scheme.
The home page typically acts as the index page for the entire site, and will contain links to the default document in each of the site's major sections. If a section is further divided into sub-sections, the default document for the section is often an index page that contains links to the default document in each sub-section. If necessary, this pattern can be repeated for the lower-level sub-sections.
At the lowest level, it is not uncommon for each page in a sub-section to contain links to all of the other pages in the sub-section, as well as to higher-level documents, including the website's home page and other important documents (for example a sitemap or privacy policy).
We have stated elsewhere that the most important feature of your website is its content. The next most important feature, regardless of the overall structure of your website, must surely be the site's navigational scheme. If the navigational scheme is confusing or difficult to use, the chances of visitors actually finding the content you have worked so hard to create will be significantly reduced.
By far the most common locations for a navigation menu are across the top of the page and down the left-hand side of the page. These are the places in which a visitor will immediately look for navigational links when they land on your home page (or any other page, for that matter). Let's start by looking at a simple horizontal navigation menu. The following HTML code creates the home page of a fictional "Famous Poems" website:
<!doctype html>
<html lang="en">
<head>
<meta charset="utf-8">
<title>Famous Poems</title>
</head>
<body>
<header style="text-align: center; padding: 1em;">
<h1>Famous Poems</h1>
</header>
<nav style="text-align: center; padding: 1em; background-color: AntiqueWhite;">
<a href="https://www.technologyuk.net/assets/poems/poem-01.html" target="_blank">The Road Not Taken</a> |
<a href="https://www.technologyuk.net/assets/poems/poem-02.html" target="_blank">The New Colossus</a> |
<a href="https://www.technologyuk.net/assets/poems/poem-03.html" target="_blank">Ozymandias</a> |
<a href="https://www.technologyuk.net/assets/poems/poem-04.html" target="_blank">Ode on a Grecian Urn</a> |
<a href="https://www.technologyuk.net/assets/poems/poem-05.html" target="_blank">The Tiger</a> |
<a href="https://www.technologyuk.net/assets/poems/poem-06.html" target="_blank">On His Blindness</a> |
<a href="https://www.technologyuk.net/assets/poems/poem-07.html" target="_blank">A Psalm of Life</a> |
<a href="https://www.technologyuk.net/assets/poems/poem-08.html" target="_blank">Daffodils</a> |
<a href="https://www.technologyuk.net/assets/poems/poem-09.html" target="_blank">Death, Be Not Proud</a> |
<a href="https://www.technologyuk.net/assets/poems/poem-10.html" target="_blank">Sonnet 18</a>
</nav>
<h2 style="text-align: center;">Introduction</h2>
<p style="width: 75%; margin: auto;">
These pages contain ten examples of some of the most famous poems ever written. The selection is based on the article <em>"10 Greatest Poems Ever Written"</em> by Evan Mantyk, dated January 7, 2016. The article appears on the website of <a href="http://classicalpoets.org" target="_blank"><em>The Society of Classical Poets</em></a>.
</p>
</body>
</html>
Copy and paste this code into a new file in your HTML editor, save the file as menu-demo-01.html, and open the file in a web browser. You should see something like the following:
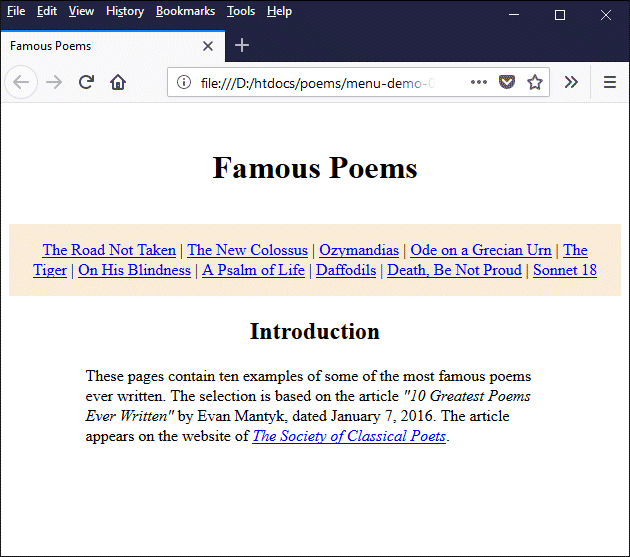
A web page with a simple horizontal menu bar
Note that for the sake of convenience, we have coded each link so that it will open the linked-to page in a separate browser window (using the target attribute). If we were creating the "Famous Poems" website for real, the linked-to page would replace the home page in the browser window, and we would implement the same navigational menu on each page (which would of course include a link back to the home page).
One thing that might occur to you is that this navigation scheme looks a little cluttered. Horizontal menu bars are normally restricted to fewer items, often using drop-down menus anchored to a link in the menu bar to hide additional menu choices until the link is clicked on. The left-to-right orientation of the items in a horizontal menu bar is familiar to users and may make it easier to read. On the other hand, it takes up space at the top of the page that could perhaps be better used for actual content.
We will now create a second version of our "Famous Poems" home page, this time with a vertical navigation menu on the left-hand side of the page, using the following HTML code:
<!doctype html>
<html lang="en">
<head>
<meta charset="utf-8">
<title>Famous Poems</title>
</head>
<body>
<header style="text-align: center; padding: 1em;">
<h1>Famous Poems</h1>
</header>
<hr>
<nav style="float: left; padding: 1em 0; background-color: AntiqueWhite; width: 30%;">
<a href="https://www.technologyuk.net/assets/poems/poem-01.html" target="_blank">The Road Not Taken</a><br>
<a href="https://www.technologyuk.net/assets/poems/poem-02.html" target="_blank">The New Colossus</a><br>
<a href="https://www.technologyuk.net/assets/poems/poem-03.html" target="_blank">Ozymandias</a><br>
<a href="https://www.technologyuk.net/assets/poems/poem-04.html" target="_blank">Ode on a Grecian Urn</a><br>
<a href="https://www.technologyuk.net/assets/poems/poem-05.html" target="_blank">The Tiger</a><br>
<a href="https://www.technologyuk.net/assets/poems/poem-06.html" target="_blank">On His Blindness</a><br>
<a href="https://www.technologyuk.net/assets/poems/poem-07.html" target="_blank">A Psalm of Life</a><br>
<a href="https://www.technologyuk.net/assets/poems/poem-08.html" target="_blank">Daffodils</a><br>
<a href="https://www.technologyuk.net/assets/poems/poem-09.html" target="_blank">Death, Be Not Proud</a><br>
<a href="https://www.technologyuk.net/assets/poems/poem-10.html" target="_blank">Sonnet 18</a>
</nav>
<div style="padding: 1em 0; float: right; width: 70%;">
<h2 style="text-align: center;">Introduction</h2>
<p style="width: 90%; margin: auto;">
These pages contain ten examples of some of the most famous poems ever written. The selection is based on the article <em>"10 Greatest Poems Ever Written"</em> by Evan Mantyk, dated January 7, 2016. The article appears on the website of <a href="http://classicalpoets.org" target="_blank"><em>The Society of Classical Poets</em></a>.
</p>
</div>
</body>
</html>
Copy and paste this code into a new file in your HTML editor, save the file as menu-demo-02.html, and open the file in a web browser. You should see something like the illustration below. Try clicking on the links to see how they work.
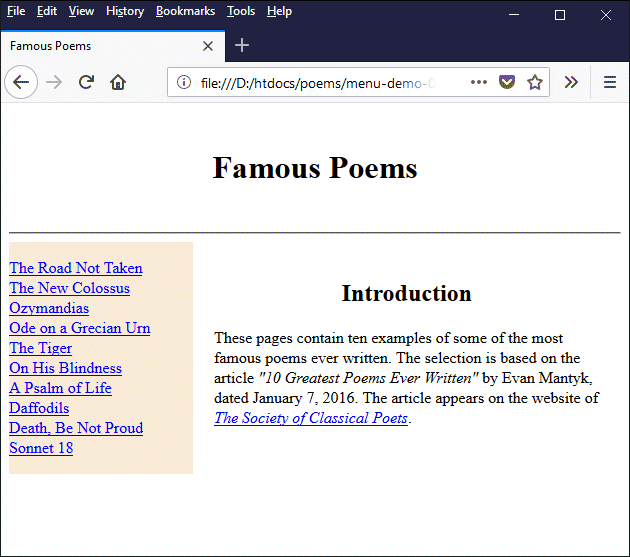
A web page with a simple vertical menu
The menu items are now listed vertically down the left-hand side of the page. We have essentially divided the width of the page below the main page heading using a <nav> element for the navigation menu and a <div> element for the main page content. The style attribute of the <nav> element has its width property set to 30%, while that of the <div> element is set to 70%.
Note that the float property for the <nav> and <div> elements must be set as shown. This has the effect of keeping these elements next to each other on the page. If we omitted to do this, the page content would be positioned below the menu instead of appearing next to it (we will be looking at how structural elements such as <nav> and <div> are used to control page layout in more detail elsewhere).
The main advantage of having a vertical menu like the one shown here is that you don't need to worry so much about the number of menu items or the length of the menu item text. The obvious disadvantage is that it reduces width of the space available for your page content.
Note that, in both examples, we could have used two <div> elements instead of a <nav> element and a <div> element; the pages would have been displayed in exactly the same way. The difference is that the <nav> element is specifically intended for use with navigation menus. Screen readers for sight impaired users can use the <nav> element to determine whether to skip over the menu and go straight to the main page content.
The examples above are somewhat lacking in style and sophistication, but they serve to illustrate how easy it is to implement a simple navigational scheme. We will be looking at how you can improve the look and feel of your page menus, and implement features like drop-down menus, in the section "Introduction to Stylesheets".
Ideally, you should decide how you are going to implement site navigation before you start creating web pages. The structure and layout of your navigational scheme, as well as your website's directory structure, will be influenced by how your content is organised. It might be helpful to create a diagram showing how your website will be structured in terms of its information architecture. You will then have a better idea of the kind of navigation scheme you want to implement, and where it should appear on each page.
All design considerations aside, your navigation menu should be as easy to use as possible, appear in the same position on each page throughout your site, be clearly visible, and have a consistent look and feel. The text of your links should be concise, but contain sufficient information to inform the user what kind of content the link is pointing to - not always an easy compromise to achieve.
Conventional wisdom maintains that you should try to limit the number of items in a single menu to seven items (plus or minus two). This seems to originate in the first instance from the work of cognitive psychologist George A. Miller, whose 1956 paper "The Magical Number Seven, Plus or Minus Two: Some Limits on Our Capacity for Processing Information" is widely interpreted as indicating that the number of objects an average person can hold in working memory is seven, plus or minus two.
In practice, again, this is not always so easy to do. You should certainly try and keep the number of menu items in a single menu as small as possible, but treat the "seven plus or minus two" thing as a guideline rather than an absolute rule. If you do need to include a significantly large number of items in a single menu, you could try organising them into smaller groups of related items to break things up a bit.
The main menu on a web page is sometimes referred to as the primary navigation menu. Not all of the navigational links in your pages will be confined to the primary navigation menu however. There will be links to other pages, like your sitemap or privacy policy, that will appear on every page in your website. These links tend to have a lower priority than the links in your primary navigation menu, and will typically be located in a secondary navigation menu, which is usually located in a less prominent part of the page.
On the technologyuk.net website, a secondary navigation bar extends across the top of each page, and contains links to the sitemap and privacy policy, as well as an email contact link. The primary navigation for each page for each page always appears in the left-hand column below the main page header, unless the display device is too small for this to be practical (we will deal with this issue elsewhere when we talk about "responsive design").
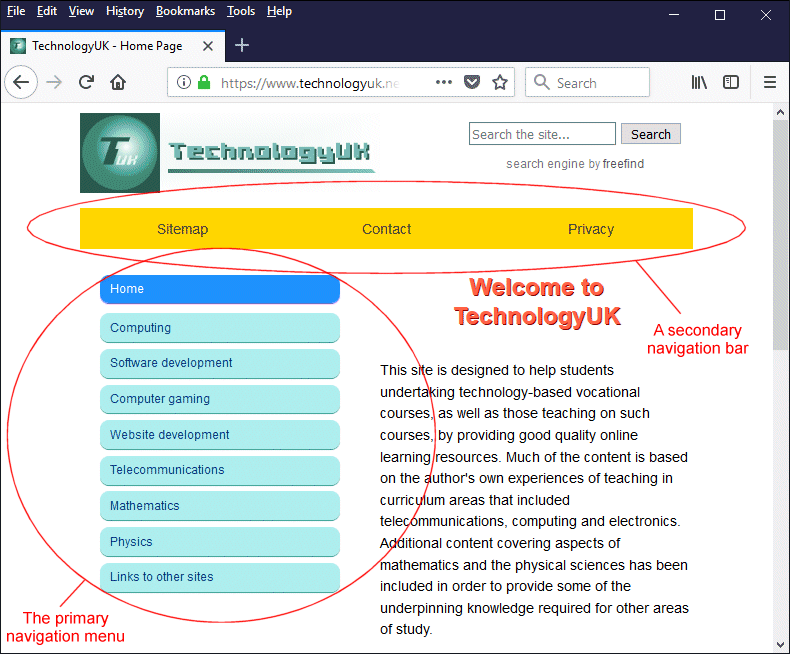
A secondary navigation bar runs across the top of each page on the technologyuk.net website
You might also have user-friendly links to various social networks like Facebook or Twitter to allow visitors to share a link to a page they think will be of interest to others, or a link that allows them to email the URL of a page they like to a friend, or even a link that allows them to send one of your pages to a printer. The technologyuk.net website has all of the above!
These types of link tend to involve the use of JavaScript, which is beyond the scope of this article. However, you don't have to be a JavaScript guru to implement them; there are numerous online resources that provide code templates that you can adapt to your own requirements. The following code HTML creates a simple web page that displays an image, and includes a print button and an email button in the page footer:
<!doctype html>
<html lang="en">
<head>
<meta charset="utf-8">
<title>Link Demo 3</title>
</head>
<body>
<div style="text-align: center; padding: 1em;">
<h2>Don't mess with these guys!</h2>
<img src="https://www.technologyuk.net/assets/demo-images/safari-01.jpg" alt="Buffalo at the water hole"><br>
</div>
<br><br>
<footer style="text-align: center; padding: 0.5em; background-color: AntiqueWhite">
<script>
var url = window.location.href;
</script>
<!-- Printer -->
<script>
document.write('<a href="javascript:window.print()"><img src="https://www.technologyuk.net/assets/icons/print_icon.png" alt="Print"></a>');
</script>
<!-- Email -->
<script>
document.write('<a href="mailto:?Subject=TechnologyUK Website&Body=I%20thought%20you%20might%20be%20interested%20in%20this%20web%20page%3A ' + url + '"><img src="https://www.technologyuk.net/assets/icons/share_icon_email.png" alt="Email"></a>');
</script>
</footer>
</body>
</html>
Copy and paste this code into a new file in your HTML editor, save the file as link-demo-03.html, and open the file in a web browser. You should see something like the illustration below. Try clicking on the icons in the footer to see how they work.
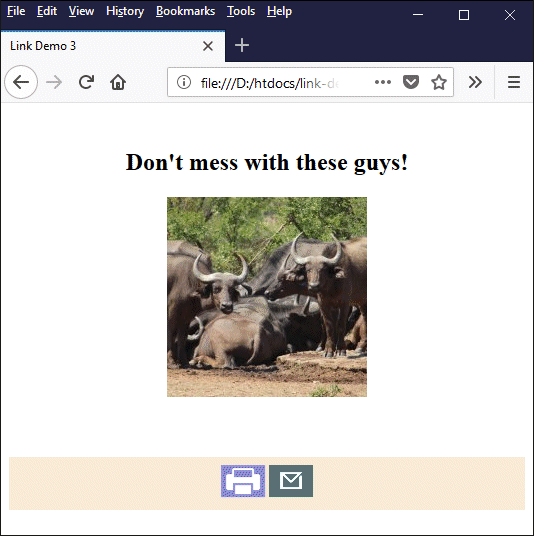
The page footer contains a print button and an email button
One final thing to mention with regard to site navigation is that your site logo (assuming you have one) should be a link back to your site's home page. This is not mandatory, but it has become a widely adopted convention. Users expect to be able to click on your site logo and return to the home page. It also provides a safety net, in case users lose their way while navigating your site - which shouldn't happen if your navigational scheme has been implemented correctly, but you never know . . .
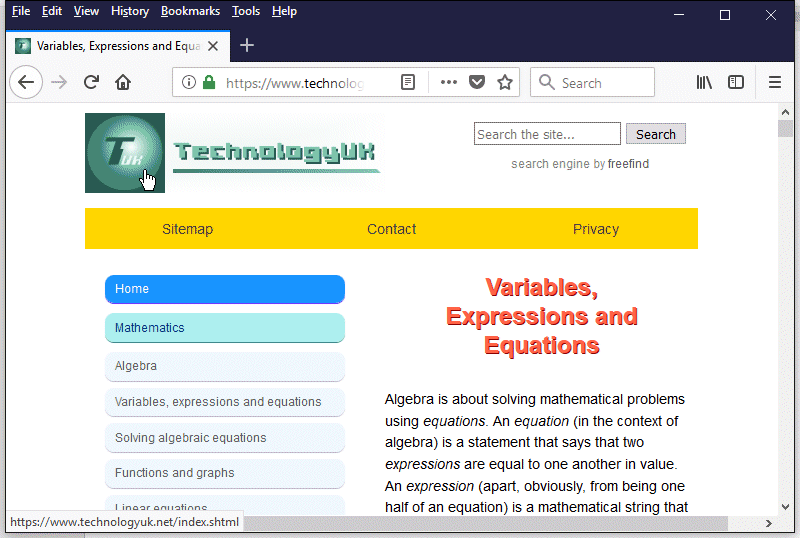
The technologyuk.net site logo is an additional link to the home page
The code fragment below shows how the technologyuk.net site logo is set up as a link to the site's home page. Note that, instead of the link text we would normally expect to see between the opening and closing anchor tags (<a> … </a>), we are using a nested <img> tag that references the site logo. We will be looking at the use of images as links in more detail a little later on.
<div class="logo">
<a href="/index.shtml">
<img src="/assets/images/logo.png" alt="The TechnologyUK Logo">
</a>
</div>
External links
External links, by definition, do not usually form part of your site navigation scheme. You may, of course, have a page (or possibly several pages) containing links to other websites that are related to your own in some way, or that you feel may be of interest to your visitors. The technologyuk.net website has a page called "Links to Other Sites", for example, which contains links to sites that might be of interest to technology students.
You may find quite often, however, that you want to place a link to an external document somewhere within the main content of a page because it is closely related to what you are writing about at that point, or because you have specifically referenced material contained within the external page. Consider the following text, which is taken from one of the articles on this website:
Various standard luminous efficiency functions have been published by the International Commission on Illumination (CIE) or Commission internationale de l'éclairage, to give it its French title. This organisation, based in Vienna, is the international authority on light, illumination, colour and colour spaces.
Here is the relevant HTML code:
<p>
Various standard luminous efficiency functions have been published by the <a class="inline" href="http://cie.co.at/" target="_blank"><em><strong>International Commission on Illumination</strong></em></a> (CIE) or <em>Commission internationale de l'éclairage</em>, to give it its French title. This organisation, based in Vienna, is the international authority on light, illumination, colour and colour spaces.
</p>
Note the use of the target attribute here, which is set to "_blank". This ensures that the linked-to page will open in a new browser window, rather than replacing our own web page in the current browser window. We don't really want to send our visitors off to another site and away from our own - they might not come back! The class attribute refers to an external style sheet, and its purpose is solely to ensure that the link has the same font face and font size as the surrounding text.
As you can see, the article refers to a publication of the International Commission on Illumination (CIE) which has significant relevance to the subject matter of our page, which is entitled "Luminous Intensity and Photometry". The relevant publications are available (for a fee) in print or as PDF downloads.
It is not possible to link to any of these publications directly for obvious reasons (some sites provide this type of publication free of charge to registered users, but it is still not possible to link to them directly). Even if the material you have referenced is freely available as a web page, or to download as a PDF or Word document, you should think carefully before linking to it directly.
Although in most cases this does not cause a problem, some organisations and individuals can take exception to you bypassing their home page altogether. In a few (admittedly very rare) cases, organisations have taken legal action against website owners who have published links to specific content on their website rather than linking to the site's homepage.
One thing you should avoid at all costs is linking to websites that contain illegal content such as pirated music or movies, or that promote illegal political organisations, or that offer for sale products that cannot normally be obtained legally such as firearms, drugs, hacked credit cards, and certain kinds of pornography. Whereas simply visiting these sites is not usually considered a crime, actively linking to them can put you on the wrong side of the law.
Link attributes
The anchor element (<a> … </a>) used to create hypertext links has a number of attributes, some of which we have already seen. The table below lists these attributes, and briefly describes how they are used. Note that, as well as the attributes listed below, the anchor element also supports HTML's global attributes.
| Attribute | Values | Description |
|---|---|---|
| download | filename | Specifies that the file specified by filename will be downloaded when a user clicks on the link (filename must be specified as the value of the href attribute). |
| href | URL | Specifies the URL of the linked-to document, i.e. the document that will be retrieved when the user clicks on the link. |
| hreflang | language_code | A two-character ISO 639-1 language code that specifies the language of the linked-to document. |
| media | media query | Specifies the media or device for which the linked document is optimised (see below). Note that, according to W3C, the media attribute is "purely advisory" when applied to hypertext links. In other words, it doesn't actually have any effect on how a document will be displayed. |
| ping | list_of_URLs | Specifies a list of URLs to which, when a user clicks on the link, are sent an HTTP POST request. Each POST request has the body ‘PING'. Used for asynchronous tracking of user clicks. |
| rel | alternate author bookmark external help license next nofollow noreferrer noopener prev search tag |
Specifies the relationship between the current document and the linked-to document (see below). |
| target | _blank _self _parent _top framename |
Specifies where to open the linked-to document as follows: _blank - opens the linked-to document in a new browsing context (i.e. a new tab or window) _self - opens the linked-to document in the current browsing context (i.e. the current tab, window or frame - this is the default behaviour) _parent - opens the linked-to document in the parent browsing context (if one exists) of the current browsing context; otherwise opens the linked-to document in the current browsing context _top - opens the linked-to document in the top-level browsing context (which may or may not be the current browsing context) framename - opens the linked-to document in a named frame NB: Frames are deprecated in HTML 5 |
| type | media_type | Specifies the Internet media type of the linked document |
As we can see from the table above, the media attribute specifies the media or device for which the linked-to document is optimised. It might tell us, for example, that the document is intended to be sent to a printer, or viewed on an iPhone. The table below lists the device values that can be assigned to the media attribute and briefly describes the kind of device(s) to which each value refers (note that two or more device values can be assigned to the same media attribute using a comma separated list).
| Device value | Type of device for which document is optimised |
|---|---|
| all | The document is suitable for all devices (this is the default value) |
| aural | Speech synthesiser |
| braille | Braille feedback device |
| embossed | Braille printer |
| handheld | Hand-held devices (typically, devices having small screens and limited bandwidth) |
| projection | Projection equipment |
| Printer (or a print preview viewing mode) | |
| screen | Computer screen |
| tty | Teletype-style display (e.g. displays using a fixed-width font) |
| tv | Televisions and similar devices (i.e. low-resolution devices, usually having limited scrolling ability) |
The device value(s) assigned to the media attribute can be accompanied by a second value that gives more information about the targeted output device, such as the width, height, or aspect ratio of the display area. The table below lists the possible values and gives a brief description of each. Note that the additional values are placed within parenthesis and preceded by a logical and operator. Note that all values except for orientation, scan and grid may be prefixed with "min-" or "max-".
| Value | Description |
|---|---|
| width | The width of the target display area. Example: media="screen and (min-width:720px)" |
| height | The height of the target display area. Example: media="screen and (min-height:1136px)" |
| device-width | The width of the target display device or paper. Example: media="screen and (max-device-width:799px)" |
| device-height | The height of the target display device or paper. Example: media="screen and (device-height:500px)" |
| orientation | The orientation of the target display or paper ("portrait" or "landscape") Example: media="print and (orientation: portrait)" |
| aspect-ratio | The width-to-height ratio of the target display area. Example: media="screen and (aspect-ratio:16/9)" |
| device-aspect-ratio | Specifies the device-width-to-device-height ratio of the target display or paper. Example: media="screen and (device-aspect-ratio:16/9)" |
| color | The number of bits used to specify a colour on the target display. Example: media="screen and (color:4)" |
| color-index | The number of colours the target device can display. Example: media="screen and (min-color-index:256)" |
| monochrome | The number of bits per pixel in a monochrome frame buffer. Example: media="screen and (monochrome:2)" |
| resolution | The pixel density (dpi or dpcm) of the target display or paper. Example: media="print and (resolution:300dpi)" |
| scan | The scanning method of a tv display ("progressive" or "interlace"). Example: media="tv and (scan:interlace)" |
| grid | Specifies whether the output device is a grid device (e.g. a tty device like a teleprinter) or a bitmap device (e.g. a printer, computer screen or television).
Values: 1 = grid, 0 = bitmap (i.e. not grid). Example: media="handheld and (grid:1)" |
As we saw above, the rel attribute specifies the relationship between the current document and the linked-to document. It might tell us, for example, that the link will take us to a page that provides help with the current document or topic, or that it takes us to a page containing information about the document's author. We could use the rel attribute as follows:
<a rel="nofollow" href="http://www.technologyuk.net/">TechnologyUK</a>
The table below lists the values that can be assigned to the rel attribute and briefly explains the meaning of each.
| Value | Meaning |
|---|---|
| alternate | The link points to an alternate version of the current document; for example, a printer or mobile-freindly version of the page, an alternative language version of the page, or even the same version of the page on a mirror website. |
| author | The link points to information about the document's author. |
| bookmark | The link points to a specific bookmark within a document. |
| external | The link points to a document on an external website. |
| help | The link points to a help document. |
| license | The link points to license information relating to the document. |
| next | The link points to the next document in the series. |
| nofollow | The link points to a document that is not endorsed by the document's creator and should therefore not be followed by a web crawler such as the Google search spider. |
| noreferrer | Indicates that the browser should not send an HTTP referrer header if the user follows the link. |
| noopener | Indicates that the page must open in a separate browser process (this essentially prevents any malicious code in the linked-to document from taking over your current browser process. It also prevents any performance issues associated with the new page from affecting your current browser process). |
| prev | The link points to the previous document in the series. |
| search | The link points to a search tool. |
| tag | Defines a keyword (tag) for the current document. |
Internal page links (bookmarks)
The hypertext links we have looked at so far all go to either another document in our website, or to a document somewhere else on the Internet. Sometimes, however, it is a good idea to create links that take the user to another part of the same page, and that enable them to return to the top of the page or the page menu if they get lost.
Being able to jump from one location to another within an HTML document is particularly useful for large documents that consist of a number of sections and subsections. It can be both tedious and annoying for the user if they have to scroll endlessly up and down a page trying to find a particular item of information, especially if they don't know exactly where that information is to be found.
HTML bookmarks solve this problem by allowing you to define a set of links somewhere near the top of your page - essentially a table of contents - from which the user can navigate to any part of your page without having to use the scrollbar. It should probably go without saying that you should also provide links that allow the visitor to return to the table of contents from wherever it is they happen to be.
A hypertext link that takes you to a particular bookmark looks very similar to any other kind of hypertext link. The main difference is that the value of the href attribute will be set to the bookmark's ID rather than to a URL. With that in mind, we obviously need to create the bookmark before we can create a link to it.
In older versions of HTML, bookmarks had to be created using the anchor tag (<a>). A bookmark could be created at the top of a document, for example, to allow the user to return to the beginning of a page by clicking on a link elsewhere in the document. The anchor would typically be inserted immediately after the opening <body> tag, and might have looked something like this:
<a name="top-of-page"></a>
Note that there doesn't need to be any text between the opening and closing anchor tags. The sole purpose of the bookmark is to mark a specific location within a document using a unique identifier. A link to this bookmark located elsewhere in the document might read as follows:
<a href="#top-of-page">Top of page</a>
The use of the hash symbol (#) tells the browser that the link is pointing to a bookmark in the current page rather than to another document. There are a couple of other things to note here, however. Firstly, the name attribute for the anchor element is deprecated in HTML 5; we must replace it with the global id attribute:
<a id="top-of-page"></a>
Secondly, since the emergence of the HTML 4.01 specification in 1999, the id attribute may be used in the opening tag of almost any element to create a bookmark (including the anchor element, of course). This means that, instead of using a separate (empty) anchor element immediately before or after an element that we wish to bookmark, we can create the bookmark within the element itself.
The following HTML code creates a web page that demonstrates how we might create a set of bookmarks and links to facilitate navigation within a single page, eliminating the need for the user to scroll endlessly up and down:
<!doctype html>
<html lang="en">
<head>
<meta charset="utf-8">
<title>Bookmark Demo 1</title>
</head>
<body id="top">
<div style="text-align: center;">
<h1>If - By Rudyard Kipling</h1>
<p>
<a href="#verse1">Verse 1</a> |
<a href="#verse2">Verse 2</a> |
<a href="#verse3">Verse 3</a> |
<a href="#verse4">Verse 4</a>
</p>
<img src="https://www.technologyuk.net/assets/demo-images/rudyard_kipling.jpg" alt="Portrait of Rudyard Kipling">
<p>Rudyard Kipling<br>Photograph: Elliot & Fry, circa 1895</p>
<div style="display: inline-block;">
<ol start="1">
<li id="verse1" style="text-align: left;">
If you can keep your head when all about you<br>
Are losing theirs and blaming it on you;<br>
If you can trust yourself when all men doubt you,<br>
But make allowance for their doubting too:<br>
If you can wait and not be tired by waiting,<br>
Or, being lied about, don't deal in lies,<br>
Or being hated don't give way to hating,<br>
And yet don't look too good, nor talk too wise;<br>
</li>
</ol>
<p><a href="#top">[Top of page]</a></p>
<ol start="2">
<li id="verse2" style="text-align: left;">
If you can dream - and not make dreams your master;<br>
If you can think - and not make thoughts your aim,<br>
If you can meet with Triumph and Disaster<br>
And treat those two impostors just the same:.<br>
If you can bear to hear the truth you've spoken<br>
Twisted by knaves to make a trap for fools,<br>
Or watch the things you gave your life to, broken,<br>
And stoop and build'em up with worn-out tools;<br>
</li>
</ol>
<p><a href="#top">[Top of page]</a></p>
<ol start="3">
<li id="verse3" style="text-align: left;">
If you can make one heap of all your winnings<br>
And risk it on one turn of pitch-and-toss,<br>
And lose, and start again at your beginnings,<br>
And never breathe a word about your loss:<br>
If you can force your heart and nerve and sinew<br>
To serve your turn long after they are gone,<br>
And so hold on when there is nothing in you<br>
Except the Will which says to them: "Hold on!"<br>
</li>
</ol>
<p><a href="#top">[Top of page]</a></p>
<ol start="4">
<li id="verse4" style="text-align: left;">
If you can talk with crowds and keep your virtue,<br>
Or walk with Kings - nor lose the common touch,<br>
If neither foes nor loving friends can hurt you,<br>
If all men count with you, but none too much:<br>
If you can fill the unforgiving minute<br>
With sixty seconds' worth of distance run,<br>
Yours is the Earth and everything that's in it,<br>
And - which is more - you'll be a Man, my son!<br>
</li>
</ol>
<a href="#top">[Top of page]</a><br><br>
<br><br><br><br><br><br><br><br><br><br>
<br><br><br><br><br><br><br><br><br><br>
<br><br><br><br><br><br><br><br><br><br>
<br><br><br><br><br><br><br><br><br><br>
<a href="#top">[Top of page]</a><br><br>
</div>
</div>
</body>
</html>
Copy and paste this code into a new file in your HTML editor, save the file as bookmark-demo-01.html, and open the file in a web browser. You should see something like the illustration below. Try clicking on the links in the menu at the top of the page and elsewhere to see how the internal navigation works.
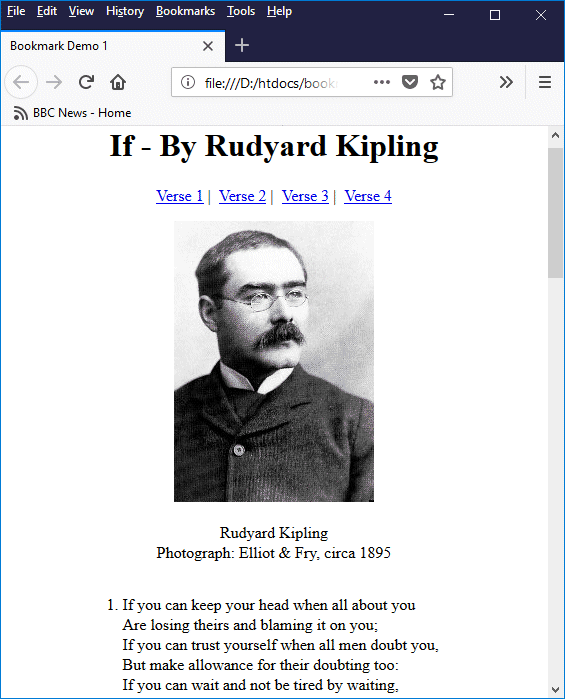
The links in this page allow the user to navigate without scrolling
The above example displays the poem "If", together with a portrait of its author Rudyard Kipling. The simple horizontal menu at the top of the page allows the user to go directly to one of the verses in the page by clicking on the appropriate link. The bookmarks for each verse are placed inside the opening tag of the paragraph that encloses the verse.
Underneath each verse, and at the very bottom of the page, there are links that allow the user to return to the top of the page, thanks to a bookmark that we have created within the opening <body> tag (note that by default, if the user clicks on a link that points to a non-existent bookmark, the browser will take the user to the top of the document anyway).
Note that, generally speaking, when a user clicks on a link to an internal bookmark, the element containing the bookmark will be positioned at the top of the browser window. The exception is the situation in which the bottom of the page is already visible in the browser window, and no further downward scrolling is actually possible.
You may have noticed that we added a large number of <br> tags at the end of the HTML code, just before the last "Top of page" link. This ensures that each verse appears at the top of the browser window when the link to its bookmark is clicked by the user (unless, of course, the page is viewed on a device with a high enough resolution to show the entire page).
As we have seen here with the "Top of page" link, it is possible to link to the same bookmark from several different locations within the same HTML document, in the same way that a particular web page may be linked to from any number of other web pages.
It is also possible to create hypertext links that point to bookmarks in other HTML documents. The following HTML code creates a hypertext link that points to verse three in the document bookmark-demo-01.html:
<a href="bookmark-demo-01.html#verse3">Verse three of "If"</a>
As you can see, the link must contain the filename of the target document, the hash symbol (#) and the ID of the target bookmark. The hash symbol and bookmark ID are collectively known as a fragment identifier.
Note that if the HTML document we are linking to is in a different directory, we need to include the path (either absolute or relative) to the HTML file. If the linked-to document is on another sever, of course, we will need to use an absolute URL that includes the scheme identifier and domain name.
Using images as links
We saw above that a website's logo is typically used as a link to the site's home page. We also saw examples of images used as links in the footer of a web page to create print and email buttons. In fact, images can be used instead of text (or in some cases as well as text) to create hypertext links just about anywhere in a web page. The only real difference between a text-based link and an image-based link is that the <img> tag appears between the opening and closing anchor tags instead of the usual link text.
Using images as links can make a web page look more aesthetically appealing than using purely text-based links, but you should choose the images to be used with care. It should be fairly obvious to the user what the link is actually pointing to. If necessary, you can provide a label underneath the image that makes its purpose clear. The label itself might even serve as an alternative (text-based) link.
One situation in which images are invariably used as links is where thumbnail images are used to create a menu for an image gallery. Clicking on a thumbnail image typically opens a separate browser window that displays a much larger version of the image, which may be accompanied by some descriptive text.
The HTML code below creates a page containing a graphical menu for a gallery of ten famous paintings. The menu consists of ten thumbnail images containing small versions of the paintings, all of which have been cropped to the same size (100 x 100 pixels). A text-based link underneath each image includes the name of the painting, the name of the artist and the year in which the painting was completed.
<!doctype html>
<html lang="en">
<head>
<meta charset="utf-8">
<title>Image Links Demo 01</title>
</head>
<body>
<div style="text-align: center">
<h1>Ten Famous Paintings</h1>
<div style="float: left; text-align: center; padding: 1em;">
<a href="https://www.technologyuk.net/assets/demo_images/painting-01-mona-lisa.jpg" target="_blank"><img src="https://www.technologyuk.net/assets/demo_images/thumbnail-01-mona-lisa.jpg" alt="The Mona Lisa" title="The Mona Lisa (click to enlarge)"></a><br>
<p style="text-align: center; font-size: 75%;"><a href="https://www.technologyuk.net/assets/demo_images/painting-01-mona-lisa.jpg" target="_blank">The Mona Lisa<br>Leonardo da Vinci<br>c. 1506</a></p>
</div>
<div style="float: left; text-align: center; padding: 1em;">
<a href="https://www.technologyuk.net/assets/demo_images/painting-02-night-watch.jpg" target="_blank"><img src="https://www.technologyuk.net/assets/demo_images/thumbnail-02-night-watch.jpg" alt="The Night Watch" title="The Night Watch (click to enlarge)"></a><br>
<p style="text-align: center; font-size: 75%;"><a href="https://www.technologyuk.net/assets/demo_images/painting-02-night-watch.jpg" target="_blank">The Night Watch<br>Rembrandt van Rijn<br>1642</a></p>
</div>
<div style="float: left; text-align: center; padding: 1em;">
<a href="https://www.technologyuk.net/assets/demo_images/painting-03-girl-with-a-pearl-earring.jpg" target="_blank"><img src="https://www.technologyuk.net/assets/demo_images/thumbnail-03-girl-with-a-pearl-earring.jpg" alt="Girl With a Pearl Earring" title="Girl With a Pearl Earring (click to enlarge)"></a><br>
<p style="text-align: center; font-size: 75%;"><a href="https://www.technologyuk.net/assets/demo_images/painting-03-girl-with-a-pearl-earring.jpg" target="_blank">Girl With a Pearl Earring<br>Johannes Vermeer<br>1665</a></p>
</div>
<div style="float: left; text-align: center; padding: 1em;">
<a href="https://www.technologyuk.net/assets/demo_images/painting-04-whistlers-mother.jpg" target="_blank"><img src="https://www.technologyuk.net/assets/demo_images/thumbnail-04-whistlers-mother.jpg" alt="Whistler's Mother" title="Whistler's Mother (click to enlarge)"></a><br>
<p style="text-align: center; font-size: 75%;"><a href="https://www.technologyuk.net/assets/demo_images/painting-04-whistlers-mother.jpg" target="_blank">Whistler's Mother<br>James McNeill Whistler<br>1871</a></p>
</div>
<div style="float: left; text-align: center; padding: 1em;">
<a href="https://www.technologyuk.net/assets/demo_images/painting-05-poppy-field.jpg" target="_blank"><img src="https://www.technologyuk.net/assets/demo_images/thumbnail-05-poppy-field.jpg" alt="The Poppy Field" title="The Poppy Field (click to enlarge)"></a><br>
<p style="text-align: center; font-size: 75%;"><a href="https://www.technologyuk.net/assets/demo_images/painting-05-poppy-field.jpg" target="_blank">The Poppy Field<br>Claude Monet<br>1873</a></p>
</div>
<div style="float: left; text-align: center; padding: 1em;">
<a href="https://www.technologyuk.net/assets/demo_images/painting-06-sunflowers.jpg" target="_blank"><img src="https://www.technologyuk.net/assets/demo_images/thumbnail-06-sunflowers.jpg" alt="Sunflowers" title="Sunflowers (click to enlarge)"></a><br>
<p style="text-align: center; font-size: 75%;"><a href="https://www.technologyuk.net/assets/demo_images/painting-06-sunflowers.jpg" target="_blank">Sunflowers<br>Vincent Van Gogh<br>1888</a></p>
</div>
<div style="float: left; text-align: center; padding: 1em;">
<a href="https://www.technologyuk.net/assets/demo_images/painting-07-the-scream.jpg" target="_blank"><img src="https://www.technologyuk.net/assets/demo_images/thumbnail-07-the-scream.jpg" alt="The Scream" title="The Scream (click to enlarge)"></a><br>
<p style="text-align: center; font-size: 75%;"><a href="https://www.technologyuk.net/assets/demo_images/painting-07-the-scream.jpg" target="_blank">The Scream<br>Edvard Munch<br>1893</a></p>
</div>
<div style="float: left; text-align: center; padding: 1em;">
<a href="https://www.technologyuk.net/assets/demo_images/painting-08-persistence-of-memory.jpg" target="_blank"><img src="https://www.technologyuk.net/assets/demo_images/thumbnail-08-persistence-of-memory.jpg" alt="The Persistence of Memory" title="The Persistence of Memory (click to enlarge)"></a><br>
<p style="text-align: center; font-size: 75%;"><a href="https://www.technologyuk.net/assets/demo_images/painting-08-persistence-of-memory.jpg" target="_blank">The Persistence of Memory<br>Salvador Dali<br>1931</a></p>
</div>
<div style="float: left; text-align: center; padding: 1em;">
<a href="https://www.technologyuk.net/assets/demo_images/painting-09-guernica.jpg" target="_blank"><img src="https://www.technologyuk.net/assets/demo_images/thumbnail-09-guernica.jpg" alt="Guernica" title="Guernica (click to enlarge)"></a><br>
<p style="text-align: center; font-size: 75%;"><a href="https://www.technologyuk.net/assets/demo_images/painting-09-guernica.jpg" target="_blank">Guernica<br>Pablo Picasso<br>1937</a></p>
</div>
<div style="float: left; text-align: center; padding: 1em;">
<a href="https://www.technologyuk.net/assets/demo_images/painting-10-son-of-man.jpg" target="_blank"><img src="https://www.technologyuk.net/assets/demo_images/thumbnail-10-son-of-man.jpg" alt="Son of Man" title="Son of Man (click to enlarge)"></a><br>
<p style="text-align: center; font-size: 75%;"><a href="https://www.technologyuk.net/assets/demo_images/painting-10-son-of-man.jpg" target="_blank">Son of Man<br>René Magritte<br>1964</a></p>
</div>
</div>
</body>
</html>
The value of the target attribute for each thumbnail image is set to "_blank". This causes the corresponding full-sized image to be displayed in its own browser window (this rather unsophisticated approach to implementing our gallery has been used to keep things simple). If the dimensions of the full-sized image are larger than the dimensions of the browser window, the browser rescales the image to fit within the browser window.
Copy and paste this code into a new file in your HTML editor, save the file as image-links-demo-01.html, and open the file in a web browser. You should see something like the illustration below. Try clicking on the thumbnail images and text-based links to see how everything works.
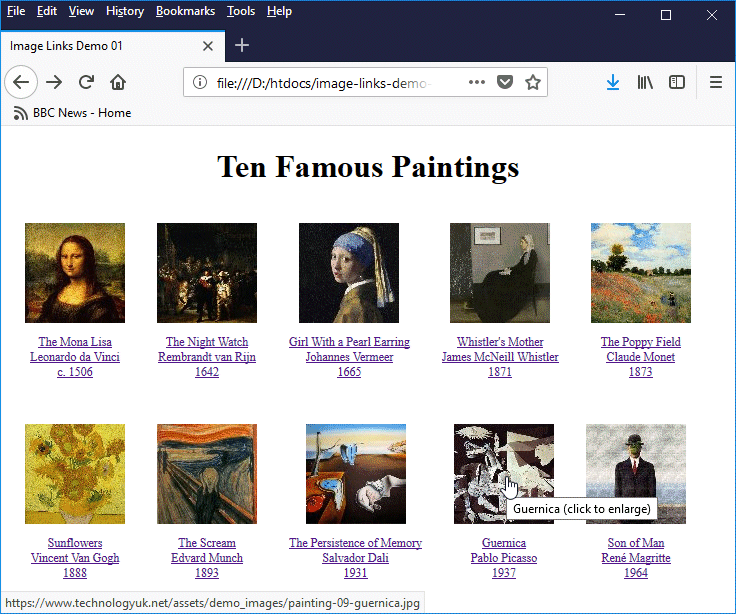
Thumbnail images are used here to create a graphical menu for an image gallery
As shown in the illustration, hovering over a thumbnail not only changes the cursor to a hand, but also displays the title of the painting and a hint telling the user to click on the thumbnail image to see a larger version. We achieved this by including this information in the image's title attribute. If you click on the Guernica thumbnail or its accompanying text-based link, you should see something like this:
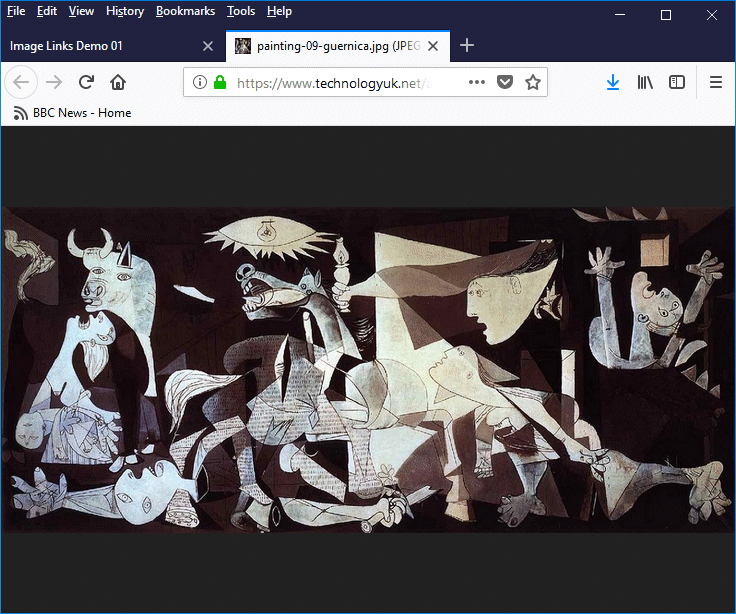
Clicking on a thumbnail image causes the browser to display a larger version in a separate browser window
You might be tempted to use images to create buttons (as opposed to simple text links). This is generally considered not to be good practice. A button that displays text conveys the same information to most users as a text-based link containing the same text. A sight-impaired person, on the other hand, may not be able to see the button, typically relying on a screen-reader.
You can of course include the required information in the image button's alternative text (using the alt attribute) to inform sight-impaired users of the purpose of the button, but this will entail additional HTML code. Furthermore, the use of an image button will obviously increase the amount of bandwidth used to download the page. If you have a large number of image buttons, the effect can become significant.
There are other reasons for not using image buttons. If you need to change the text on a button, for example, you will need to either create a new button or edit the existing button using a graphics package. Perhaps the best reason of all, however, is that it is perfectly possible to create professional-looking and aesthetically pleasing text-based links that look like buttons using the appropriate styling (we will be looking at how this is done in the section "Introduction to CSS".
Client-side image maps
Image maps come in two basic flavours - client-side and server-side. A server-side image map relies on some kind of server-side script in order to function. We are interested here only in client-side image maps, which can be implemented using just HTML and do not rely on any server-side code.
An image map is an image in a web page for which different parts of the image, when clicked on, will take the user to another web page (or to another location within the same document). In order for this to be possible, it is necessary to define each area within the image that will be associated with a particular link using a set of bounding coordinates, and to specify the URL or bookmark associated with each area.
The image map consists of two main elements; an image (of course!), and a map with which the image must be associated. The image is included in the HTML document in the same way as any other image, using the image tag. The only difference is that the image tag will include the usemap attribute, which associates it with the map. The map is defined using the <map> element.
The <map> element has a name attribute to which must be assigned a name value that is unique within the HTML document. The image associated with the image map will have this name value assigned to its usemap attribute. A number of <area> elements must be defined between the opening and closing <map> … </map> tags - one for each clickable area of the image.
Each <area> element defines the coordinates and shape of a single clickable area. Needless to say, you should attempt to avoid overlapping areas. If any of the areas do overlap, the order in which the areas are defined will be used by the web server to determine priority, and the link belonging to the area with the highest priority will be the one that is followed.
The shape of the clickable area will fall into one of three categories: rectangular, circular or polygonal (specified respectively using the keywords rect, circ and poly). The way in which the coordinates of an area are specified will depend upon its shape. Coordinates are specified as pixel values using a coordinate system in which the origin (0,0) is the top left-hand corner of the image to which the image map refers.
A rectangle requires two coordinate pairs - one that specifies the rectangle's top left-hand corner and one that specifies its bottom right-hand corner. A circle requires a single coordinate pair to specify its centre, and a third value to specify its radius. A polygon can have as many coordinate pairs as are necessary in order to define its shape.
The HTML code below creates a page that contains an image map. The image used for the image map depicts various well-known species of dinosaur. Each dinosaur appears on a coloured rectangular background, and each area defined for the image map contains the x and y coordinate pairs for one rectangle.
<!doctype html>
<html lang="en">
<head>
<meta charset="utf-8">
<title>Image Map Demo 01</title>
</head>
<body>
<div style="text-align: center;">
<h1>Image Map Demo 01</h1>
<h2>Dinosaurs</h2>
<img src="https://www.technologyuk.net/assets/demo-images/dino-image-map.jpg" usemap="#dinosaur" alt="Dinosaur image map">
</div>
<map name="dinosaur">
<area shape=rect coords="16,11,234,143" href="https://www.technologyuk.net/assets/dinosaurs/dino-01-stegosaurus.html" target="_blank" alt="Stegosaurus" title="Stegosaurus">
<area shape=rect coords="16,152,234,257" href="https://www.technologyuk.net/assets/dinosaurs/dino-02-diplodocus.html" target="_blank" alt="Diplodocus" title="Diplodocus">
<area shape=rect coords="16,266,234,378" href="https://www.technologyuk.net/assets/dinosaurs/dino-03-tyrannosaurus-rex.html" target="_blank" alt="Tyrannosaurus Rex" title="Tyrannosaurus Rex">
<area shape=rect coords="250,11,431,257" href="https://www.technologyuk.net/assets/dinosaurs/dino-04-brachiosaurus.html" target="_blank" alt="Brachiosaurus" title="Brachiosaurus">
<area shape=rect coords="250,266,431,378" href="https://www.technologyuk.net/assets/dinosaurs/dino-05-triceratops.html" target="_blank" alt="Triceratops" title="Triceratops">
</map>
<div style="text-align: center;">
<div style="display: inline-block; text-align: left;">
<ol>
<li><a href="https://www.technologyuk.net/assets/dinosaurs/dino-01-stegosaurus.html" target="_blank">Stegosaurus</a></li>
<li><a href="https://www.technologyuk.net/assets/dinosaurs/dino-02-diplodocus.html" target="_blank">Diplodocus</a></li>
<li><a href="https://www.technologyuk.net/assets/dinosaurs/dino-03-tyrannosaurus-rex.html" target="_blank">Tyrannosaurus Rex</a></li>
<li><a href="https://www.technologyuk.net/assets/dinosaurs/dino-04-brachiosaurus.html" target="_blank">Brachiosaurus</a></li>
<li><a href="https://www.technologyuk.net/assets/dinosaurs/dino-05-triceratops.html" target="_blank">Triceratops</a></li>
</ol>
</div>
</div>
</body>
</html>
Copy and paste this code into a new file in your HTML editor, save the file as image-map-demo-01.html, and open the file in a web browser. You should see something like the illustration below. Try clicking on different parts of the image to see how the image map works.
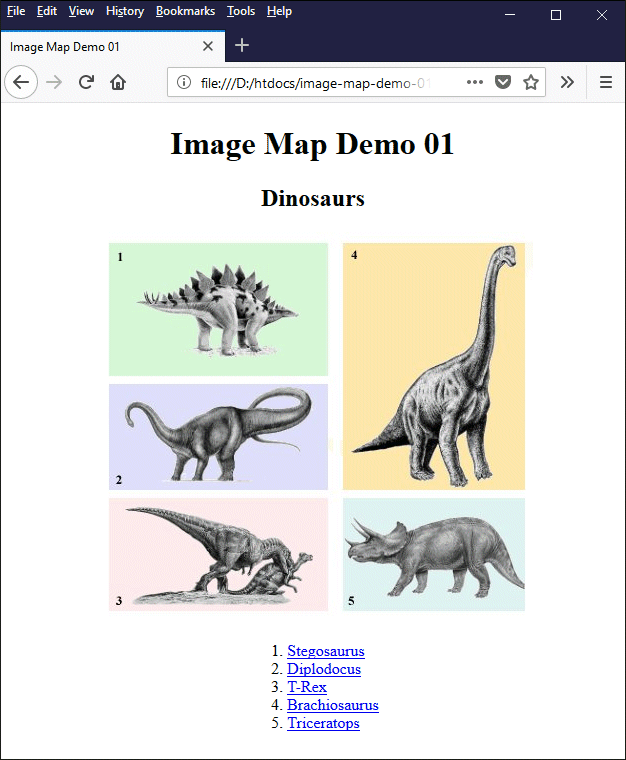
You can click on an area of the image map or the text-based link associated with it
Each map area, when clicked on, will open a web page containing an illustration and a brief description for a particular dinosaur (the web pages in this instance are hosted on our server). Each area tag includes both the alt attribute and the global title attribute. The alt attribute specifies alternate text for an area in the event that the image itself cannot be displayed. The title attribute gives the user information about the linked-to page when they hover over the area to which it relates with the mouse.
Click on one of the dinosaurs in the image. You should see something like the following (we clicked on the Diplodocus):
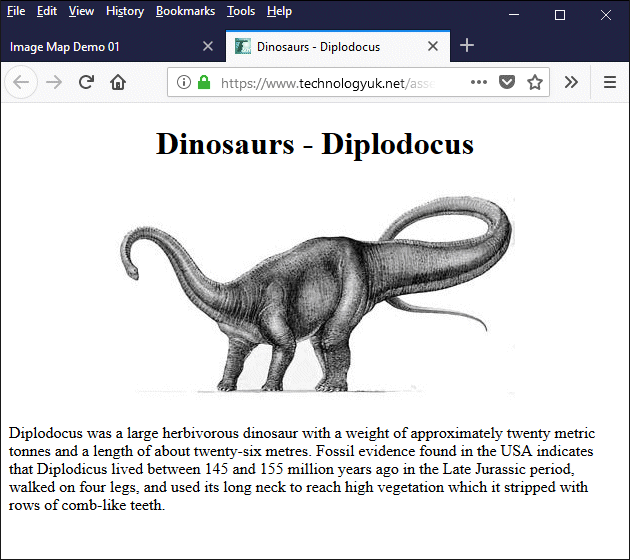
Clicking on one of the dinosaurs in the image will open that dinosaur's web page
Note that if you scale the image using the image tag's width and height attributes, you will also need to scale the map area coordinates accordingly. There is also an issue that arises if the image is re-scaled by the browser. This may occur, for example, if you have set the max-width property of the image tag's style attribute to a percentage of the image's parent container.
One way of dealing with this situation would be to re-scale the map area coordinates using a scripting language like JavaScript, although a discussion of how to do this is beyond the scope of this article. In any case, you should always provide redundant text-based links as we have done in the above example. This ensure that, should your image map not behave as expected for any reason, the user can still access the web pages to which it is linked.
In order to specify the coordinates for each area in an image map, you will need to open the image in a graphics package (Microsoft's Paint application would probably suffice for this purpose). Hover over each point for which you wish to find the x and y coordinates using the mouse. The point's coordinates will typically be displayed in the lower right-hand corner of the screen.
Image maps provide an additional form of navigation, potentially enhancing the interactive nature of your web pages and providing more information about the pages they link to than a purely text-based link. Using image maps for your main navigational scheme, however, is not a good idea. Only use an image map if you feel it will positively contribute to the overall usability of your page, and always provide text-based links as a backup.
