JavaScript Control Structures
Overview
Computer programs are collections of program instructions. A very simple program that carries out a single basic task might consist of a few dozen lines of code that are executed one after another, starting with the first program instruction and ending with the last. Such a program is very easy to write, but not particularly useful.
Even back in the days of batch processing, when mainframe computers carried out repetitive tasks that required little or no human intervention, a computer program would typically have to execute the same procedure a certain number of times, or branch to a different part of the program depending on the input it received, or respond to some unexpected error condition.
Today, application programs are generally far more versatile, and certainly far more interactive, than their mainframe-based predecessors. The high-level programming languages used to create those application programs now provide the programmer with a range of program flow control mechanisms that facilitate a structured programming approach. JavaScript is no exception.
Program flow is the order in which the statements and procedures in a script or program are executed. Control structures are programming constructs that determine which statements or procedures are executed at a given point in a program, either based on the evaluation of one or more variables or in response to some external input. In the absence of control structures, program statements will execute sequentially, i.e. in the order in which they appear in the code.
There are two basic kinds of control structure - conditional and iterative. A conditional control structure typically defines a sequence of one or more program statements that will be executed if a particular condition is met. In simple terms, you can think of a conditional control structure as a fork in the road. Program execution will follow one fork or the other, depending on whether or not the specified condition has been met.
An iterative control structure is one that loops through (iterates) a sequence of program statements repeatedly, until some predetermined exit condition is met. Program loops generally fall into one of two categories. The first kind of program loop we will consider is called a counting loop. A counting loop iterates (i.e. executes one complete cycle) a fixed number of times, and then exits the loop. The number of iterations is determined by the value of a special counter variable.
The other kind of program loop you will encounter is called a conditional loop. This kind of loop can execute any number of times, and the program will only exit the loop when the loop's exit condition has been met. There is a potential danger in using conditional loops that you should be aware of, namely the possibility of creating an infinite loop.
Infinite loops are created either because an exit condition has not been defined, or because the exit condition that has been defined can never be met (this can also happen with counting loops if we forget to increment the loop's counter variable). You could liken this to an industrial process that will be terminated by a remote control system once a sensor detects some pre-defined condition. If the sensor fails to detect that condition, the process will continue indefinitely, possibly with catastrophic consequences.
The code executed by a control structure when some predefined condition has been met may consist of a single statement or a whole sequence of statements, the purpose of which is to carry out some specific task. We refer to such a sequence of statements as a block statement. The block statement is enclosed within a pair of curly braces, as shown here:
{
statement 1;
statement 2;
statement 3;
.
.
.
statement n;
}
It is code within a block statement like this that is executed when the condition defined by a conditional control structure is met. For an iterative control structure, the block statement will be executed repeatedly until the loop's counter has reached its maximum value, or until the loop's exit condition has been met.
A widely used convention in JavaScript programming is that the code to be executed by a control structure should be enclosed within curly braces, even if it consists of a single statement. This is a belt and braces approach (no pun intended!), but one that can prevent you from introducing a difficult-to-trace bug into your script. Compare the two code fragments below:
// code fragment 1
if (some_condition == true) {
statement 1;
statement 2;
}
// code fragment 2
if (some_condition == true)
statement 1;
statement 2;
Both of these code fragments do the same thing, don't they? Well, actually, not quite. In fact, this is one of those rare occasions when the answer to the question really is "Yes and no."! Let's suppose that, in both cases, some_condition does indeed evaluate to true, and examine what will happen.
In the first code fragment, both of the statements inside the curly braces will be executed because they form a single block statement. In the second code fragment, the first statement following the if statement will be executed, because some_condition evaluates to true. The second statement following the if statement will also be executed, because it is the next statement in the program's logical sequence.
Now let's consider what happens if some_condition evaluates to false. In the first code fragment, neither of the statements inside the curly braces will be executed, because they both form part of the same block statement, the execution of which is dependent on whether or not some_condition evaluates to true. In the second code fragment, the first statement following the if statement will not be executed because some_condition evaluates to false, but the second statement will be executed.
A control structure must have some way of knowing which code it should execute if its condition evaluates to true. In most cases, this is achieved by placing the statement to be executed immediately after the statement that evaluates the condition. Anything that comes after that is part of the normal sequential flow of the program.
The fact that we have indented the second statement following the if statement in the second example above seems to indicate that it forms part of the control structure. Remember, however, that the JavaScript interpreter doesn't care about indentation. If we want several statements to be executed when a condition evaluates to true, but not executed when a condition evaluates to false, we have to put those statements inside curly braces to create a block statement. In the examples on this page, we will always use curly braces even when there really is only one statement to be executed.
So far in these pages, although we have provided sample code that will certainly work, we have not created any complete working examples. From this point forward we will be providing complete working examples of web pages that implement JavaScript functionality. We assume, since you are reading this article, that you are already reasonably conversant with the hypertext markup language (HTML) and cascading style sheets (CSS). In the unlikely event that you are not, these topics are dealt with in some detail elsewhere on this website.
The if statement
The simplest conditional statement we can use in our scripts is the if statement. We have already seen an example of how the if statement is used. Here is the syntax:
if (condition) {
// statement(s) to be executed
}
If condition evaluates to true (or a value that is truthy), the statements inside the curly braces will be executed. If condition evaluates to false (or a value that is falsey), the statements inside the curly braces will not be executed. Let's look at an example. The following code creates a simple web page that displays two headings and a button control:
<!doctype html>
<html lang="en">
<head>
<meta charset="utf-8">
<title>JavaScript Demo 01</title>
<style>
div {
text-align: center;
margin: auto;
}
</style>
<script>
function changeBackground() {
if (document.body.style.backgroundColor == "white") {
document.body.style.backgroundColor = "black";
document.body.style.color = "white";
return;
}
if (document.body.style.backgroundColor == "black") {
document.body.style.backgroundColor = "white";
document.body.style.color = "black";
return;
}
}
</script>
</head>
<body>
<script>
document.body.style.backgroundColor = "white";
</script>
<div>
<h1 style="text-align: center">JavaScript Demo 01</h1>
<h2 style="text-align: center">Change the background colour</h2>
<p><button onclick="changeBackground()">Change the background colour</button></p>
</div>
</body>
</html>
Copy and paste this code into a new file in your HTML editor, save the file as javascript-demo-01.html, and open the file in a web browser. You should see something like the following:
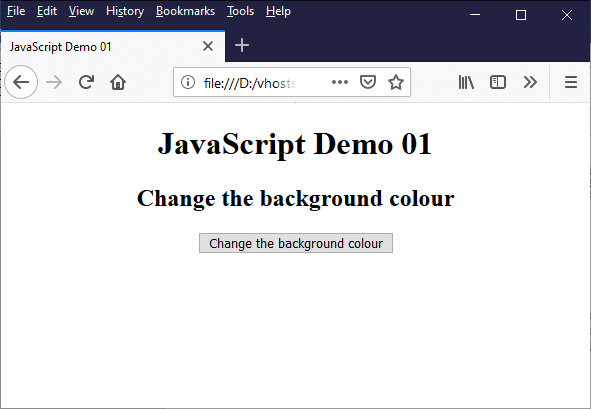
The web page displays two headings and a button control
Clicking the button once changes the background and text colours from black text on a white background to white text on a black background. Clicking the button once more will change the colours back again. We set the background colour for the body of the HTML document with this code:
<script>
document.body.style.backgroundColor = "white";
</script>
This is necessary because, although the browser's background colour is white by default, we are going to manipulate it by changing the value of the CSS properties that determine the <body> element's background colour (background-color) and text colour (color) which are referenced using the HTML document object model (DOM) style object properties backgroundColor and color The code sets an initial value for the <body> element's background-color CSS property.
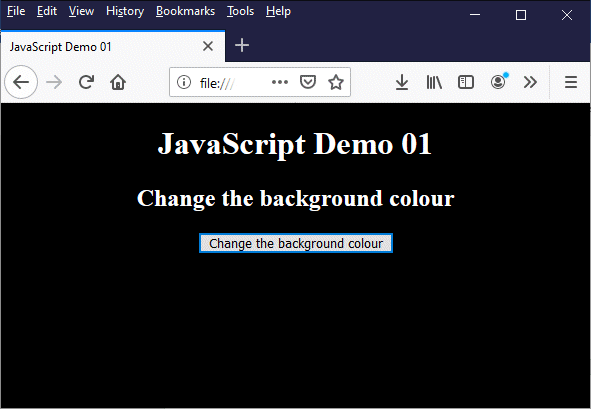
Clicking the button reverses the text and background colours
The code that actually toggles the background and text colours for our web page consists of a JavaScript function that is defined in the head of the HTML document:
<script>
function changeBackground() {
if (document.body.style.backgroundColor == "white") {
document.body.style.backgroundColor = "black";
document.body.style.color = "white";
return;
}
if (document.body.style.backgroundColor == "black") {
document.body.style.backgroundColor = "white";
document.body.style.color = "black";
return;
}
}
</script>
The function consists of two if statements. The first if statement will be executed if the current background colour is white, and changes the colour scheme to white text on a black background. The second if statement executes if the current background colour is black, and sets the background and text colours back to their original values (black text on a white background).
There are a few other things to note here. First of all, as a general rule JavaScript uses the same name for CSS properties as CSS, with one significant difference. CSS property names are always written in lower case. When a property name consists of two or more words, therefore, they are always separated by a hyphen. An element's text colour property, for example, has the name color, whereas an element's background colour property has the name background-color.
JavaScript entity names are not allowed to contain hyphens. Whereas the CSS color property is also referred to as color in JavaScript, the CSS background-color property name is converted to its camel case equivalent, backgroundColor. The hyphen is removed, and the word that would have followed the hyphen now begins with a capital letter.
Another important thing to note is the way in which JavaScript accesses the properties it wants to set or modify. You should by now be familiar with the notion that every element in an HTML document is an object. Every element also has a default style which is determined by the browser, and may have styles applied to it by an embedded or an external stylesheet. The element may also have styles applied to it inline using the element's style attribute.
This last method is essentially what we are doing here. We are accessing an HTML <body> element's style attribute, retrieving its color and background-color CSS properties, and then modifying those properties. Client-side scripting languages, JavaScript included, access the objects, attributes and properties that make up an HTML document using the document object model (DOM).
The DOM is a tree-like hierarchical structure that represents each element in an HTML document as a node. The root of the tree is the node that represents the document itself (document). Every other node in the tree is a descendant of the document node. In this case we want to change the text and background colours of the <body> element, which is represented by the body node - a direct descendant of the document node.
Accessing these properties is relatively straightforward, because we know exactly where to find the body node in the DOM. There is only one body node, and it is a direct descendant of the document node. To address the background-color property of the <body> element's style attribute, therefore, we use this:
document.body.style.backgroundColor
Things will not always be this straightforward, because we often need to access HTML elements further down the tree, of which there may also be multiple instances within the document. Getting to a specific element in the DOM, however, is something we'll be looking at in more detail elsewhere.
if...else
You are probably thinking - especially if you have any experience with programming - that using back-to-back if statements to deal with alternative possibilities is a rather inelegant way of dealing with the problem at hand, and you would be right. The if ... else construct is a far cleaner way of coding a solution to this particular problem. The general syntax is as follows:
if (condition) {
// statement(s) to be executed
} else {
// statement(s) to be executed
}
Here is the revised version of javascript-demo-01.html:
<!doctype html>
<html lang="en">
<head>
<meta charset="utf-8">
<title>JavaScript Demo 02</title>
<style>
div {
text-align: center;
margin: auto;
}
</style>
<script>
function changeBackground() {
if (document.body.style.backgroundColor == "white") {
document.body.style.backgroundColor = "black";
document.body.style.color = "white";
}
else {
document.body.style.backgroundColor = "white";
document.body.style.color = "black";
}
return;
}
</script>
</head>
<body>
<script>
document.body.style.backgroundColor = "white";
</script>
<div>
<h1 style="text-align: center">JavaScript Demo 02</h1>
<h2 style="text-align: center">Change the background colour</h2>
<p><button onclick="changeBackground()">Change the background colour</button></p>
</div>
</body>
</html>
Copy and paste this code into a new file in your HTML editor, save the file as javascript-demo-02.html, and open the file in a web browser. You should see exactly the same thing you saw with the original version. The "Change the background colour" button will function in exactly the same way when clicked as it did before. We have however shortened our code somewhat.
We now have only one condition to evaluate: "If the background is white do this, else do that". We also only need one return statement now, since either the if part of our function will be executed, or the else part will be executed, but not both (we could even omit the return statement altogether in this case, since the function does not return a value). Which is all well and good, but it does essentially limit us to just two possibilities. Suppose we want to choose from a wider range of different background and text colours?
if...else if...else
Let's suppose we want to extend the range of choices for our web page's background and text colours. We won't be too ambitious just yet, but let's say we want the following choices to be available:
- Black text on a white background
- White text on a black background
- Orange-red text on an orange background
- Orange text on an orange-red background
We'll also assume that we want the "Change the background colour" button to cycle through the options one after the other. Here is the revised code:
<!doctype html>
<html lang="en">
<head>
<meta charset="utf-8">
<title>JavaScript Demo 03</title>
<style>
div {
text-align: center;
margin: auto;
}
</style>
<script>
function changeBackground() {
if (document.body.style.backgroundColor == "white") {
document.body.style.backgroundColor = "black";
document.body.style.color = "white";
}
else if (document.body.style.backgroundColor == "black") {
document.body.style.backgroundColor = "orange";
document.body.style.color = "orangered";
}
else if (document.body.style.backgroundColor == "orange") {
document.body.style.backgroundColor = "orangered";
document.body.style.color = "orange";
}
else {
document.body.style.backgroundColor = "white";
document.body.style.color = "black";
}
return;
}
</script>
</head>
<body>
<script>
document.body.style.backgroundColor = "white";
</script>
<div>
<h1 style="text-align: center">JavaScript Demo 03</h1>
<h2 style="text-align: center">Change the background colour</h2>
<p><button onclick="changeBackground()">Change the background colour</button></p>
</div>
/body>
</html>
Copy and paste this code into a new file in your HTML editor, save the file as javascript-demo-03.html, open the file in a web browser, and click on the "Change the background colour" button a few times. At some point, you should see something like the following:
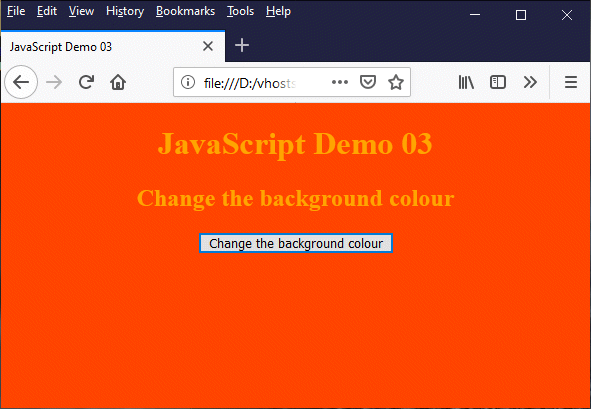
Clicking the button cycles through the colour scheme options
We certainly won't be winning and prizes for web page design with this demo page, but at least it demonstrated how the if ... else if ... else construct works. In theory, you could use this construct to cycle through any number of options, but there are better ways to do that, as we shall see.
The switch statement
The switch statement essentially allows us to do the same sort of thing we can do with an if ... else if ... else construct, but in a more elegant way. Think about how we might deal with multiple options. Let's say we have ten different conditions to test for. Using an if ... else if ... else construct, our code might look something like this:
if (condition01) {
// statement(s) to be executed
}
else if (condition02) {
// statement(s) to be executed
}
else if (condition03) {
// statement(s) to be executed
}
.
.
.
.
.
.
else if (condition10) {
// statement(s) to be executed
}
else {
// statement(s) to be executed
}
The final else statement represents some default action to be taken if none of the ten conditions we are testing for are met. We can do exactly the same thing with a switch statement, which would look like this:
switch (expression) {
case value01:
// statement(s) to be executed
break;
case value02:
// statement(s) to be executed
break;
case value03:
// statement(s) to be executed
break;
.
.
.
.
.
.
case value10:
// statement(s) to be executed
break;
default:
// statement(s) to be executed
}
The switch statement evaluates expression and then compares the result with each case value in the body of the switch statement in turn. When a matching case value is found, the statements immediately following the case statement are executed, including the break statement, which exits the switch statement. Execution then continues with the statement immediately following the switch statement.
If the break statement is omitted, then once the statements immediately following the matching case statement have been executed the next case value will still be compared with expression, regardless of the fact that we have already found a match. Even though this will (usually) not affect the overall functioning of the script, it results in unnecessary processing, so remember to always include a break statement for each case to be evaluated (the default case doesn't need a break statement).
The following code cycles through sixteen different background colours (we've chosen to use the sixteen named colours defined in the W3C HTML 4.01 Recommendation, published in 1999) and sets an appropriate contrasting text colour (either black or white):
<!doctype html>
<html lang="en">
<head>
<meta charset="utf-8">
<title>JavaScript Demo 03</title>
<style>
div {
text-align: center;
margin: auto;
}
</style>
<script>
function changeBackground() {
switch (document.body.style.backgroundColor) {
case "white":
document.body.style.backgroundColor = "black";
document.body.style.color = "white";
break;
case "black":
document.body.style.backgroundColor = "silver";
document.body.style.color = "black";
break;
case "silver":
document.body.style.backgroundColor = "gray";
document.body.style.color = "white";
break;
case "gray":
document.body.style.backgroundColor = "maroon";
document.body.style.color = "white";
break;
case "maroon":
document.body.style.backgroundColor = "red";
document.body.style.color = "white";
break;
case "red":
document.body.style.backgroundColor = "purple";
document.body.style.color = "white";
break;
case "purple":
document.body.style.backgroundColor = "fuchsia";
document.body.style.color = "white";
break;
case "fuchsia":
document.body.style.backgroundColor = "green";
document.body.style.color = "white";
break;
case "green":
document.body.style.backgroundColor = "lime";
document.body.style.color = "black";
break;
case "lime":
document.body.style.backgroundColor = "olive";
document.body.style.color = "white";
break;
case "olive":
document.body.style.backgroundColor = "yellow";
document.body.style.color = "black";
break;
case "yellow":
document.body.style.backgroundColor = "navy";
document.body.style.color = "white";
break;
case "navy":
document.body.style.backgroundColor = "blue";
document.body.style.color = "white";
break;
case "blue":
document.body.style.backgroundColor = "teal";
document.body.style.color = "white";
break;
case "teal":
document.body.style.backgroundColor = "aqua";
document.body.style.color = "black";
break;
case "aqua":
document.body.style.backgroundColor = "white";
document.body.style.color = "black";
break;
default:
document.body.style.backgroundColor = "black";
document.body.style.color = "white";
}
}
</script>
</head>
<body>
<div>
<h1 style="text-align: center">JavaScript Demo 03</h1>
<h2 style="text-align: center">Change the background colour</h2>
<p><button onclick="changeBackground()">Change the background colour</button></p>
</div>
</body>
</html>
Copy and paste this code into a new file in your HTML editor, save the file as javascript-demo-04.html, open the file in a web browser, and click on the "Change the background colour" button a few times. You should see the page cycling through different background colours.
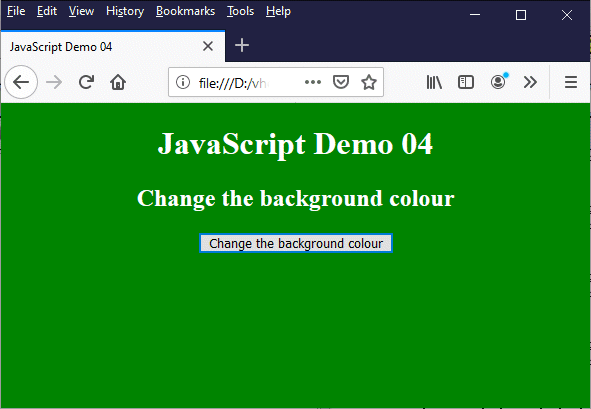
Clicking the button cycles through the 16 basic web colours
Note that the JavaScript code that appeared immediately after the opening <body> tag in the previous examples is no longer required. If the background-color CSS property for the <body> element is undefined (or defined as something other than "white" by the browser), then the switch statement's default case statement will be executed, and the page will be displayed with a black background.
Using the switch statement achieves the same thing as using multiple if ... else statements, but in a more compact way (the expression to be evaluated only appears only once, in the first line of the switch statement).
We can also use the switch statement to execute the same code for a number of different case values. The following code creates a web page that prompts the user to enter the date in the input box provided, and a "Display day" button that will display a different message, depending on which day of the week the date entered happens to fall on.
<!doctype html>
<html lang="en">
<head>
<meta charset="utf-8">
<title>JavaScript Demo 05</title>
<style>
div {
text-align: center;
margin: auto;
}
</style>
<script>
let days = ["Sunday", "Monday", "Tuesday", "Wednesday", "Thursday", "Friday", "Saturday"];
function displayDay() {
let dateInput = document.getElementById("date").value;
let myDate = new Date(dateInput);
let dayOfWeek = myDate.getDay();
let msgOutput = document.getElementById("msg");
switch (dayOfWeek) {
case 0:
case 1:
case 2:
case 3:
case 4:
msgOutput.innerHTML = "It's " + days[dayOfWeek] + ". Tomorrow is a workday . . . no partying!";
break;
case 5:
msgOutput.innerHTML = "It's " + days[dayOfWeek] + ". Tomorrow is " + days[dayOfWeek + 1] + " . . . party on Dude!";
break;
case 6:
msgOutput.innerHTML = "It's " + days[dayOfWeek] + ". Tomorrow is " + days[0] + " . . . you can take it easy!";
break;
default:
msgOutput.innerHTML = "You appear not to have entered a date.";
}
return;
}
</script>
</head>
<body>
<div>
<p><label for="email">Enter the date:</label></p>
<p><input type="date" id="date"></p>
<p><button onclick="displayDay()">Display day</button></p>
<p id="msg"></p>
</div>
</body>
</html>
Copy and paste this code into a new file in your HTML editor, save the file as javascript-demo-05.html, open the file in a web browser, and enter a date in the format dd/mm/yyyy (depending on the browser you are using, you may see a date-picker widget). Once you have entered a valid date, click on the "Display day" button. The message displayed will depend on the date you enter. If that date falls on a Sunday, for example, you will see something like this:
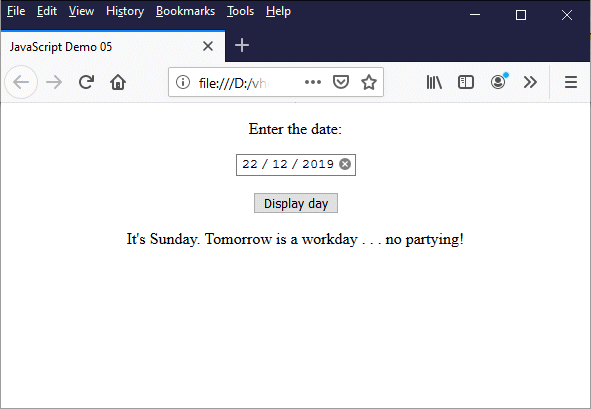
The message displayed depends on the date selected
There are several points to note here. We have the first use of a JavaScript array variable, which is declared as follows:
let days = ["Sunday", "Monday", "Tuesday", "Wednesday", "Thursday", "Friday", "Saturday"];
The array elements consist of a comma-separated list of string literals, each enclosed within double quotes (either single or double quotes can be used; we tend to use double quotes for string values unless there is a compelling reason not to). JavaScript arrays, as in most programming languages, are indexed using integer values, starting with zero (0). The first element in the array, "Sunday", is referenced as days[0].
The next thing to note is that, in this example, JavaScript is accessing two elements within the HTML document using each element's id attribute. Consider this statement:
let dateInput = document.getElementById("date").value;
Here we are declaring the variable dateInput, and assigning to it the value of the value attribute of the HTML element whose id attribute is set to "date", which happens to be an <input> element of type date. If the user has entered a valid date into the element's input field in the format dd/mm/yyyy, either manually or using a date-picker widget, the dateInput variable will now hold a value of type Date. Otherwise, its value will be undefined.
The next statement creates a new instance of the built-in JavaScript Date object using the object's constructor function (more about these elsewhere), and assigns a reference to the object to the variable myDate (note the use of the new keyword):
let myDate = new Date(dateInput);
The following statement creates the variable dayOfTheWeek and assigns an integer value to it, depending on which day of the week the date entered by the user happens to fall on. The Date object's getDay() method returns the day of the week from a Date object as an integer value (0 = Sunday, 1 = Monday, 2 = Tuesday, 3 = Wednesday, 4 = Thursday, 5 = Friday and 6 = Saturday).
let dayOfWeek = myDate.getDay();
The rest of the script is taken up by the switch statement, and is relatively straightforward. The first five cases (the integer values 0, 1, 2, 3, and 4) represent the days Sunday, Monday, Tuesday, Wednesday and Thursday. If the value of dayOfWeek matches any of these cases, a text message is generated that tells the user what day it is, reminds them that the next day is a workday, and advises against partying.
The next case (5) represents a Friday. If the value of dayOfWeek matches it, the user is again told what day it is. This time, however, they are also advised that the next day is Saturday, and encouraged to party. The last case (6) represents a Saturday. The user is once more told what day it is, advised that tomorrow is a Sunday, when they can take it easy (they will probably need to if they intend to do any serious partying on Saturday!).
One final thing worth noting here is that the HTML code creates a paragraph element (<p>) whose id attribute is assigned the value "msg". The paragraph element is empty until the script assigns some text to it. As we have seen, the wording of the message to be output will depend on which case value(s) in the switch statement match the value of dayOfWeek. Where will that message be sent to? Consider this statement, which we have so far ignored, but which appears immediately before the switch statement:
let msgOutput = document.getElementById("msg");
The variable msgOutput thus represents the empty HTML paragraph element. Remember, however, that the text inside an HTML element is also a document node, referred to in the DOM as the element's inner HTML. We can thus add, delete or modify the text inside an HTML element in JavaScript using the element's innerHTML property. For example, the code
msgOutput.innerHTML = "You appear not to have entered a date.";
puts the text "You appear not to have entered a date." into the HTML paragraph element represented by the msgOutput variable (i.e. the paragraph element whose id attribute is set to "msg").
The for loop
The first iterative control structure we shall look at is the for loop, which is sometimes referred to as a counting loop because we can specify how many times the statements that make up the body of the for statement should be executed. The syntax of a for loop is as follows:
for (<initialise counter>; <condition>; <increment/decrement counter>) {
// statement(s) to be executed
}
The <initialise counter> part of the for statement executes just once, and sets the initial counter value - usually to zero (0). The <condition> part specifies the condition that must be true in order for the statements within the body of the loop to continue. The condition usually states that the value of the loop counter must be less than some maximum value, although it could also specify that the value must be greater than some minimum value, depending on whether the counter variable is being incremented with each iteration or decremented.
Before each iteration of the loop, the <condition> part of the loop is evaluated to determine whether or not it evaluates to true. If it does, the statements in the loop body are executed, and the <increment/decrement> part of the for statement increments (or decrements) the counter variable. Otherwise, program execution exits the loop and continues with the statement immediately following the loop.
Counting loops can be very useful when we want to process things like lists and arrays that have a fixed number of list items or array elements. In the next example, we will use a for loop to extract information from three JavaScript arrays and create an HTML table that displays information about the GDP of the world's ten most highly populated countries. Here is the code:
<!doctype html>
<html lang="en">
<head>
<meta charset="utf-8">
<title>JavaScript Demo 06</title>
<style>
div { text-align: center; }
p { max-width: 400px; margin: auto; }
table { border-collapse: collapse; margin: 1em auto; }
td, th { border: 1px solid; padding: 0.25em; }
.left { text-align: left; }
.right { text-align: right; }
</style>
<script>
function writeTable() {
let country = ["China", "India", "United States", "Indonesia", "Pakistan", "Brazil", "Nigeria", "Bangladesh", "Russia", "Japan"];
let pop = [1.421022, 1.338677, 0.325085, 0.264651, 0.207906, 0.207834, 0.190873, 0.159685, 0.145530, 0.127503];
let gdp = [12.238, 2.651, 19.485, 1.015, 0.305, 2.054, 0.376, 0.250, 1.578, 4.872];
let gdpTable = "<table><tr><th>Country</th><th>Population<br>($billion)</th><th>GDP<br>($trillion)</th><th>GDP<br>per capita<br>($1,000)</th></tr>";
for (let i = 0; i < country.length; i++ ) {
gdpTable += "<tr><td class='left'>" + country[i] + "</td>";
vgdpTable += "<td class='right'>" + pop[i].toFixed(6) + "</td>"
gdpTable += "<td class='right'>" + gdp[i].toFixed(3) + "</td>";
gdpTable += "<td class='right'>" + (gdp[i] / pop[i]).toFixed(3) + "</td></tr>";
}
gdpTable += "</table>";
document.getElementById("tableOutput").innerHTML = gdpTable;
}
</script>
</head>
<body onload="writeTable()">
<div>
<h1>JavaScript Demo 06</h1>
<h2>Population and GDP (2017)</h2>
<p>
The table below lists the top ten most populated countries in the world, together with their population and gross domestic product (GDP) in US dollars, for the year 2017.
</p>
<div id="tableOutput"></div>
</div>
</body>
</html>
Copy and paste this code into a new file in your HTML editor, save the file as javascript-demo-06.html, and open the file in a web browser. You should see something like this:
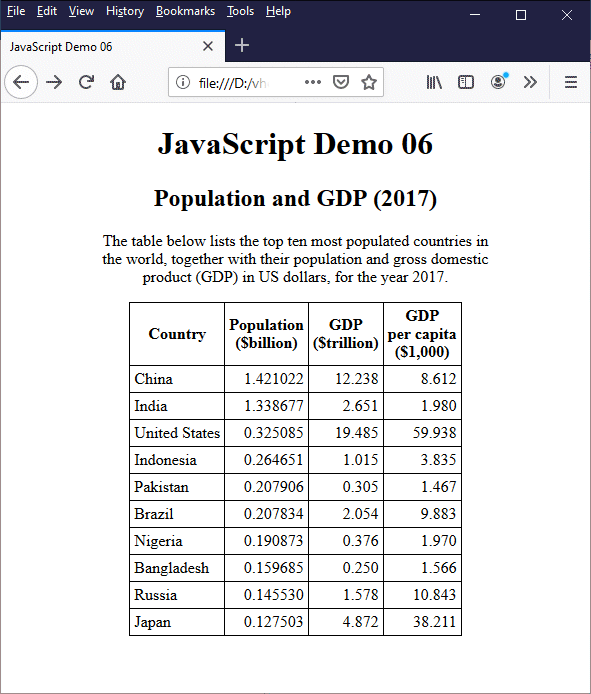
The table displays population and GDP data
In this example, we have created an empty HTML <div> element and set its id attribute to "tableOutput". The table that displays the data contained in our three JavaScript arrays will be a child of this <div> element. The HTML code that actually implements that table is generated entirely by the JavaScript function writeTable(). Let's break that function down line by line. The first three lines create the arrays that hold the table's data:
let country = ["China", "India", "United States", "Indonesia", "Pakistan", "Brazil", "Nigeria", "Bangladesh", "Russia", "Japan"];
let pop = [1.421022, 1.338677, 0.325085, 0.264651, 0.207906, 0.207834, 0.190873, 0.159685, 0.145530, 0.127503];
let gdp = [12.238, 2.651, 19.485, 1.015, 0.305, 2.054, 0.376, 0.250, 1.578, 4.872];
The next line creates the JavaScript string variable that will hold the HTML code for the table, and adds the HTML code for the table's column headers:
let gdpTable = "<table><tr><th>Country</th><th>Population<br>($billion)</th><th>GDP<br>($trillion)</th><th>GDP<br>per capita<br>($1,000)</th></tr>";
Each table row that follows the headers will contain the name of a country, the population of that country, its GDP, and the GDP per capita. The country, population and GDP values in each row are extracted from the arrays country, pop and gdp; the last value (GDP per capita) is calculated for each row using the population and GDP values for that row.
This is an ideal situation in which to use a loop, because the HTML code generated for each row will be identical apart from the inner HTML of the table data (<td>) elements, which we extract from the arrays as we iterate through the loop using the loop counter i to index the correct array element in each case. It's also a good use case for a counting loop, because we know exactly how many iterations are needed (ten).
We don't even have to know the number of iterations needed to use a counting loop, however, since we can determine this programmatically, as we have done here, using the JavaScript array object's length method. Here's the first line of our for loop:
for (let i = 0; i < country.length; i++ )
We've set the maximum number of iterations to country.length, which will be ten (10) because there are ten array elements in each array. If we had more or less elements in each array, our code would work just as well because the length method returns the length of the array, whatever that happens to be.
Of course in real life, if we had static information of this kind to display in a table, we would simply create the table using HTML; we wouldn't need to use JavaScript. Where this kind of JavaScript functionality comes into its own is where the data is not static. We might, for example, be reading the data from a file, or retrieving it from a database, in which case it is very possible that neither the data values nor the number of records involved would be known in advance.
The body of the loop consists of the following four lines of code:
gdpTable += "<tr><td class='left'>" + country[i] + "</td>";
gdpTable += "<td class='right'>" + pop[i].toFixed(6) + "</td>"
gdpTable += "<td class='right'>" + gdp[i].toFixed(3) + "</td>";
gdpTable += "<td class='right'>" + (gdp[i] / pop[i]).toFixed(3) + "</td></tr>";
This code is executed ten times, once for each country whose data we want to display. We could, in fact, have achieved the same result with just one line of code, but it would have been long and rather unwieldy. We chose to write the code like this for the sake of readability.
Note that we have used the number object's toFixed method to keep the number of digits displayed after the decimal point the same for all of the numeric values in a particular column. This is not strictly necessary, but it makes the output look a bit neater than it otherwise would. We'll look at various ways of formatting numeric data in a bit more detail elsewhere in these pages.
Here are the last two lines of our writeTable() function:
gdpTable += "</table>";
document.getElementById("tableOutput").innerHTML = gdpTable;
The first line simply adds the text "</table>" to the gdpTable string variable, which now contains all of the HTML code required to create the table. The second line sets the inner HTML of the element whose id attribute is set to "tableOutput" (that's the empty <div> element) to gdpTable, which is the string variable that contains the HTML code for the table.
There may also be occasions when, instead of incrementing a counter from zero and exiting the for loop when it reaches some predetermined maximum value, we can do things the other way around; the counter is initialised to its maximum value and decremented after each iteration of the loop. The final iteration occurs when the value of the counter reaches zero, after which program execution continues with the statement immediately following the for statement, as before.
Decrementing a counter can be useful when we want to traverse a list from the bottom up -perhaps in order to remove list items that do not meet some specified requirement, in which case, had we used an incremental approach, the numbering of list items further down the list from the deleted item would change. This would invalidate the maximum counter value, and cause the for statement to try and access list items beyond the end of the list.
We could also decrement the counter from some maximum value in order to reverse the ordering of a list or an array. For example, suppose that re replaced the following code in the previous example:
for (let i = 0; i < country.length; i++)
with this:
for (let i = country.length - 1; i >= 0; i--)
The resulting HTML page will be identical to one we saw previously, except that the ordering of the table data will be reversed (the data for the country with the lowest population will appear in the first row, while the data for the country with the highest population will appear in the last row. Note for future reference that, although we normally increment or decrement a counter variable by one, we can in theory use any integer value to increment or decrement the counter.
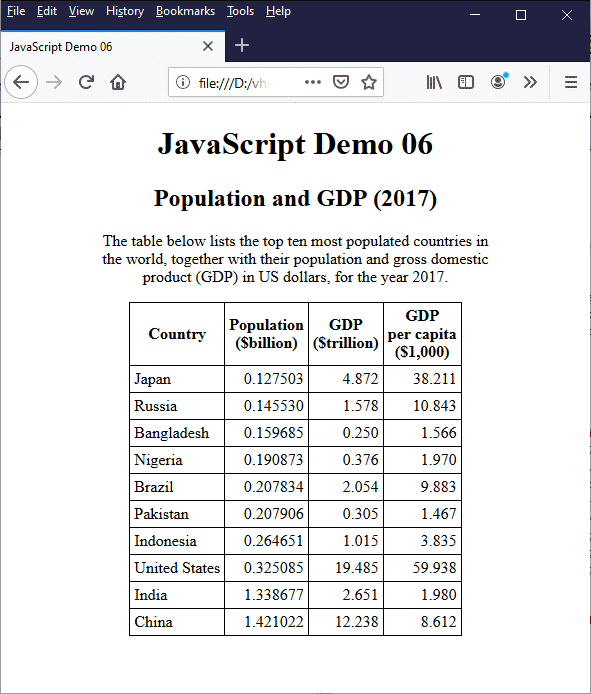
The ordering of the table data has been reversed
for...of
The for...of loop was introduced with ECMAScript 2015. We can use a for...of loop to iterate over a JavaScript iterable. An iterable is an array-like object made up of elements that can be sequentially accessed. An array is, of course, an iterable by definition. Other iterables include maps, sets and strings. You should already be familiar with arrays and strings. We will be looking at other kinds of iterable elsewhere.
The syntax of a for...of loop is as follows:
for (<variable> of <iterable>) {
// statement(s) to be executed
}
We can view <iterable> as a data source on which we want to iterate. The iteration variable (<variable>) can be created using const, let or var (we recommend that you avoid using the var keyword unless you are working with legacy code). On each iteration of the for...of loop, the iteration variable is assigned the value of one element of the data source. For an array, this would be an array element; for a string, it would be a unicode character.
Elements are accessed sequentially, and loop execution ends when the last element has been accessed. The HTML code below creates a web page that uses a for...of loop to display the elements of an array as a list. Each array element is a string consisting of the UTF 8 symbol for a different chess piece, and a label describing it. Here is the code:
<!doctype html>
<html lang="en">
<head>
<meta charset="utf-8">
<title>JavaScript Demo 07</title>
<style>
.center { text-align: center; }
.list { text-align: left; display: inline-block; }
p { margin: 1em; }
</style>
<script>
function outputChessPieces() {
let chessSymbols = ["♔ - White King", "♕ - White Queen", "♖ - White Rook", "♗ - White Bishop", "♘ - White Knight", "♙ - White Pawn", "♚ - Black King", "♛ - Black Queen", "♜ - Black Rook", "♝ - Black Bishop", "♞ - Black Knight", "♟ - Black Pawn"];
let chessSet = "";
for (let piece of chessSymbols) {
vchessSet += piece + "<br>";
}
document.getElementById("list").innerHTML = chessSet;
}
</script>
</head>
<body onload="outputChessPieces()">
<div class="center">
<h1>JavaScript Demo 07</h1>
<h2>Chess Pieces in HTML</h2>
<p>
The HTML symbols for chess pieces:
</p>
<div class="list">
<p id="list"></p>
</div>
</div>
</body>
</html>
Copy and paste this code into a new file in your HTML editor, save the file as javascript-demo-07.html, and open the file in a web browser. You should see something like this:
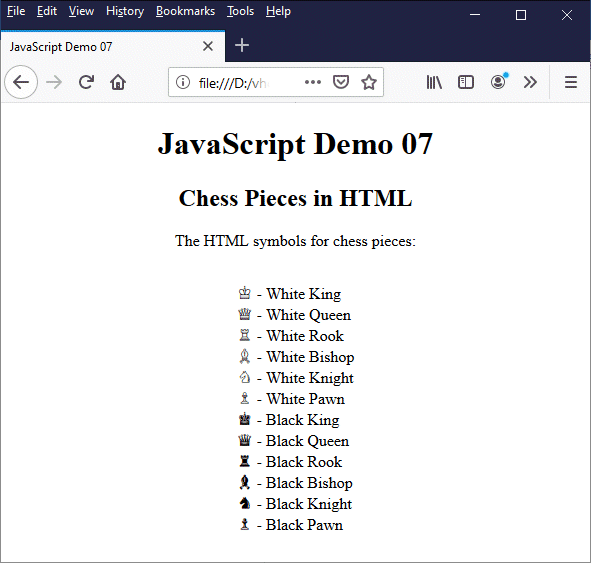
The array elements are displayed as a list
The advantage of the for...of loop over a standard for loop is that a for...of loop works for all iterable objects, not just arrays. We could, for example, do something similar with a string. Here's a new twist on the ubiquitous "Hello World!" program:
<!doctype html>
<html lang="en">
<head>
<meta charset="utf-8">
<title>JavaScript Demo 08</title>
<style>
.center { text-align: center; }
p { margin: 1em; }
</style>
<script>
function outputChars() {
let myString = "Hello World!";
let charSet = "";
for (let character of myString) {
charSet += character + "<br>";
}
document.getElementById("chars").innerHTML = charSet;
}
</script>
</head>
<body onload="outputChars()">
<div class="center">
<h1>JavaScript Demo 08</h1>
<h2>Disassembling a String</h2>
<p>The characters in "Hello World!":</p>
<p id="chars"></p>
</div>
</body>
</html>
Copy and paste this code into a new file in your HTML editor, save the file as javascript-demo-08.html, and open the file in a web browser. You should see something like this:
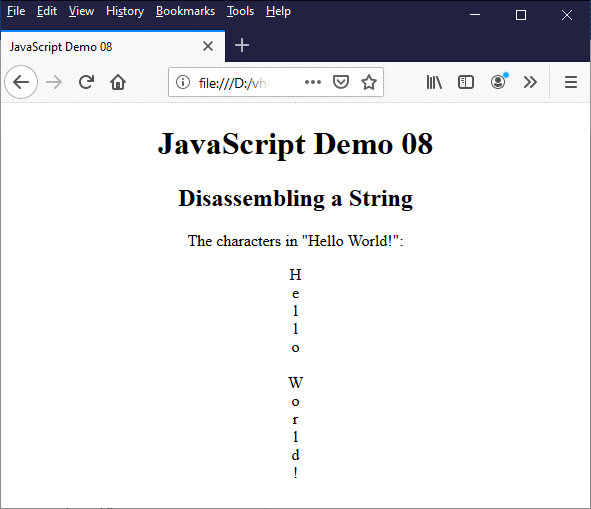
Each character of "Hello World!" is displayed on its own line
for...in
A for...in loop iterates through the enumerable properties of a JavaScript object. The term enumerable essentially refers to properties that can be listed in loops. MDN describes enumerable properties as:
"those properties whose internal enumerable flag is set to true, which is the default for properties created via simple assignment or via a property initializer (properties defined via Object.defineProperty and such default enumerable to false). Enumerable properties show up in for...in loops unless the property's key is a Symbol. Ownership of properties is determined by whether the property belongs to the object directly and not to its prototype chain."
Loosely translated (and in very general terms), this means that some of the properties of JavaScript's built-in objects may be enumerable, whereas all of the properties of user-defined objects will be enumerable unless their enumerable flag is explicitly set to false (by default it will be set to true). The enumerable properties of an object will include enumerable properties inherited from another object (i.e. one that precedes them in the prototype chain).
As an example, think about an array variable. Using a for loop or a for...in loop, you can iterate through the elements of an array because the Array object's index property is enumerable. The for...in loop, however, will not iterate over the array object's length property, because this property is not enumerable.
While we're on the subject of arrays, you should not use a for...in loop to traverse the elements of an array, because the array may contain elements that are either not initialised or that have been deleted. A for loop will correctly return a value of undefined for these array elements, whereas a for...in loop will simply ignore them altogether. Also, the order in which the for...in loop iterates the enumerable properties of an object is implementation dependent, and therefore cannot be relied upon.
The syntax of the for...in loop is as follows:
for (variable in object) {
// statements to be executed
}
In this syntax, object represents the name of the object in which we are interested and variable represents the name of an enumerable property belonging to that object. On each iteration of the loop, a different property name is assigned to variable.
The following HTML code uses JavaScript to create an object that contains information about a fictional person, and a function that uses a for...in loop to retrieve the name of each property and its assigned value and display that information in a table. Here is the code:
<!doctype html>
<html lang="en">
<head>
<meta charset="utf-8">
<title>JavaScript Demo 09</title>
<style>
div { text-align: center; }
p { max-width: 400px; margin: auto; }
table { border-collapse: collapse; margin: 1em auto; }
td, th { border: 1px solid; padding: 0.25em; }
td { text-align: left; }
</style>
<script>
function writeTable() {
let person = {};
person.fname = "Fred";
person.lname = "Bloggs";
person.address = "23, Railway Cuttings";
person.tel = "0123 456789";
person.email = "fbloggs@somedomain.com";
let personTable = "<table><tr><th>Property</th><th>Value</th></tr>";
for (property in person) {
personTable += "<tr><td>" + property + "</td>";
personTable += "<td>" + person[property] + "</td></tr>"
}
personTable += "</table>";
document.getElementById("tableOutput").innerHTML = personTable;
}
</script>
</head>
<body onload="writeTable()">
<div>
<h1>JavaScript Demo 09</h1>
<h2>The for...in loop</h2>
<p>
The table below lists the property names and values for the person object.
</p>
<div id="tableOutput"></div>
</div>
</body>
</html>
Copy and paste this code into a new file in your HTML editor, save the file as javascript-demo-09.html, and open the file in a web browser. You should see something like this:
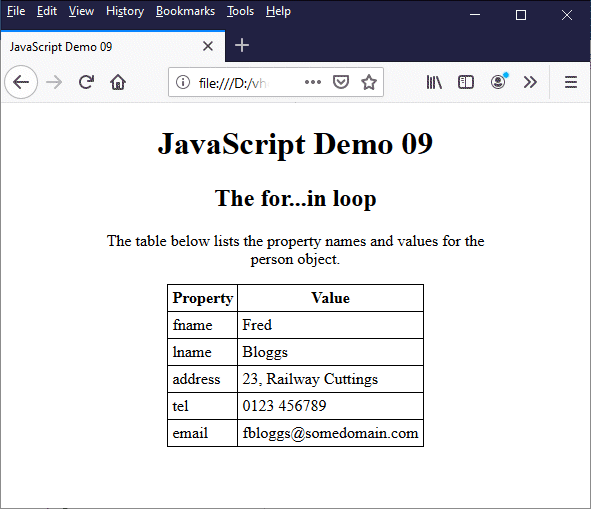
The table displays the property names and values for the person object
The for...in loop iterates, in an arbitrary order, over all enumerable properties of an object that are keyed by strings (as opposed to Symbols), including any inherited properties that are also enumerable. If you want to limit the for...in loop to iterating over enumerable properties that belong to the object (as opposed to inherited enumerable properties), you can use the object's hasOwnProperty() method. The following code illustrates this point:
<!doctype html>
<html lang="en">
<head>
<meta charset="utf-8">
<title>JavaScript Demo 10</title>
<style>
div { text-align: center; }
p { max-width: 400px; margin: auto; }
table { border-collapse: collapse; margin: 1em auto; }
td, th { border: 1px solid; padding: 0.25em; }
.left { text-align: left; }
</style>
<script>
function writeTable() {
let rightTriangle345 = {};
rightTriangle345.opp = 3;
rightTriangle345.adj = 4;
rightTriangle345.hyp = 5;
function redRightTriangle345() {
this.color = "red";
}
redRightTriangle345.prototype = rightTriangle345;
let myTriangle = new redRightTriangle345();
let propertiesTable = "<table><tr><th>Property</th><th>Value</th><th>Inherited</th></tr>";
for (property in myTriangle) {
propertiesTable += "<tr><td class='left'>" + property + "</td>";
propertiesTable += "<td>" + myTriangle[property] + "</td>";
propertiesTable += "<td>";
if (myTriangle.hasOwnProperty(property)) {
propertiesTable += "No";
}
else {
propertiesTable += "Yes";
}
propertiesTable += "</td></tr>";
}
propertiesTable += "</table>";
document.getElementById("tableOutput").innerHTML = propertiesTable;
}
</script>
</head>
<body onload="writeTable()">
<div>
<h1>JavaScript Demo 10</h1>
<h2>The hasOwnProperty() method</h2>
<p>
The table below lists the inherited and local property names and values for the redRightTriangle345 object.
</p>
<div id="tableOutput"></div>
</div>
</body>
</html>
Copy and paste this code into a new file in your HTML editor, save the file as javascript-demo-10.html, and open the file in a web browser. You should see something like this:
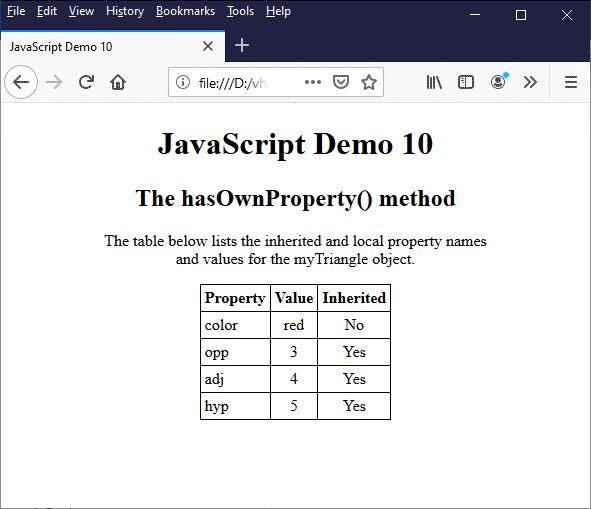
The myTriangle object has three inherited properties
The for...in loop is quite useful as a debugging tool - for example, if you need to check the properties of an object by outputting the property names and values to the console or to a test page. You can also use it in situations where you wish to work with data consisting of key-value pairs, in which the property name could act as the "key".
The while loop
The while loop, as the name suggests, iterates while some condition evaluates to true. Once the condition evaluates to false, code execution exits the loop and continues with the statement immediately following the end of the loop. The syntax of the while statement is as follows:
while (condition) {
// statements to be executed
}
One thing to note about the while loop is that there is no guarantee that the statement(s) inside the loop body will ever be executed, because condition is evaluated on each iteration of the loop before the statements in the loop body are executed. If condition evaluates to false on the very first iteration, program execution skips the loop body and exits the loop.
We can write a counting loop using a while statement that essentially does exactly the same thing as a counting loop that uses the for statement. For example, both of the following code snippets do the same thing:
let x = 0;
while (x < 10) {
// statement(s) to be executed
x++;
}
for (let x = 0; x < 10; x++) {
// statement(s) to be executed
}
If the statements to be executed within each loop body are the same, the output of the loops will be identical. The main difference between the two constructs is that the counter variable for the while statement is declared as an external variable, whereas the counter variable for the for statement is declared within the for statement itself, and cannot be accessed from outside the for statement. Another difference is that the while statement's counter variable must be updated within the body of the loop.
The HTML code below creates a web page that displays the initial layout of the chess pieces on a chess board. We have essentially used while to create a counting loop, so you could just as easily use a for loop to create the same page, but it illustrates how while might be used.
<!doctype html>
<html lang="en">
<head>
<meta charset="utf-8">
<title>JavaScript Demo 11</title>
<style>
.center { text-align: center; }
table {
border-collapse: collapse;
margin: 1em auto;
font-size: 2em;
}
tr td { background-color: #eec; }
tr:nth-child(even) td:nth-child(odd), tr:nth-child(odd) td:nth-child(even) {
background-color: #8d8;
}
td {
border: 1px solid;
width: 2em;
height: 2em;
}
</style>
<script>
function outputChessBoard() {
let i = 0, row = 0;
let chessSymbol = ["♜", "♞", "♝", "♛", "♚", "♝", "♞", "♜", "♟", "♟", "♟", "♟", "♟", "♟", "♟", "♟", , , , , , , , , , , , , , , , , , , , , , , , , , , , , , , , , "♟", "♟", "♟", "♟", "♟", "♟", "♟", "♟", "♖", "♘", "♗", "♕", "♔", "♗", "♘", "♖"];
let chessBoard = "<table><tr>"
while (i < 64) {
if (!chessSymbol[i]) {
chessBoard += "<td></td>";
}
else {
chessBoard += "<td>" + chessSymbol[i] + "</td>";
}
if ((i + 1) % 8 === 0) {
chessBoard += "</tr><tr>";
}
i++;
}
chessBoard += "</tr></table>";
document.getElementById("list").innerHTML = chessBoard;
}
</script>
</head>
<body onload="outputChessBoard()">
<div class="center">
<h1>JavaScript Demo 11</h1>
<h2>Chess Board Initial Layout</h2>
<div id="list"></div>
</div>
</body>
</html>
Copy and paste this code into a new file in your HTML editor, save the file as javascript-demo-11.html, and open the file in a web browser. You should see something like this:
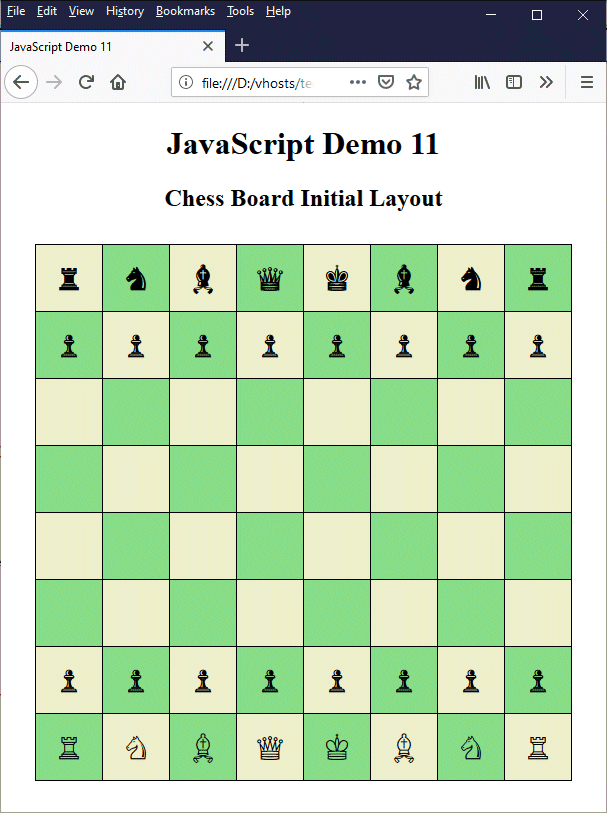
A while loop is used here to create a "chess board" table
Most of the code should be fairly self-explanatory. The while statement loops through the chessSymbol array, which contains sixty-four elements. The first sixteen elements in the array, and the last sixteen elements in the array, are the characters representing the chess pieces to be found on a chess board at the start of a game. The remaining array elements are empty, and will return a value of "undefined".
On each iteration of the loop, if the current array element does not contain a chess piece symbol (in which case its value is undefined), the string "<td></td>" (the HTML code for an empty table data cell) is written to the chessBoard string (this string will eventually hold the HTML code for the entire table). Otherwise, the code for a table data element containing that symbol is added to the string. Note that we use an if...else construct inside the while loop to achieve this.
We use another if statement to determine when each new table row should start. We do this by using the modulo operator (%) to check whether i + 1 is exactly divisible by eight. If it is, we add "</tr><tr>" to the chessBoard string. This is the HTML code that closes the current table row and open the next table row. The final step in each iteration of the while loop is to increment the counter variable i by one. If we forget to do this, the loop will run forever!
The sizing of the chessboard pieces and the chessboard squares, together with the background colours for the chessboard squares, are set using an embedded style sheet. If you are familiar with CSS, you should be able to see how the "checkerboard" effect is achieved. Essentially, we set the background colour for all of the table data cells to the same (light) colour. Then we set a darker colour for odd-numbered cells on even-numbered rows, and even-numbered cells on odd-numbered rows.
do...while
The do...while statement works in an almost identical fashion to the while statement. The only difference is that the code in the body of a do...while loop is guaranteed to be executed at least once. The syntax of the do...while statement is as follows:
do {
// statements to be executed
} while (condition);
As you can see, condition is evaluated after the loop body, so that even if condition evaluates to false on the very first iteration of the loop, the code inside the loop body will be execute once before program execution passes to the statement Immediately following the do...while statement.
The HTML code below creates a web page that lets the user play a guessing game in which they have to guess the value of a randomly selected number between one and fifteen. Once the user has correctly guessed the number, a message will be displayed, the contents of which will depend on how many guesses were required.
<!doctype html>
<html lang="en">
<head>
<meta charset="utf-8">
<title>JavaScript Demo 12</title>
<style>
.center { text-align: center; }
p { margin: 1em; }
</style>
<script>
function playGame() {
const MIN = 1, MAX = 15;
let secretNumber = Math.floor(Math.random() * (MAX - MIN + 1)) + MIN;
let guess = 0, guesses = 0;
do {
let input = prompt("Please enter a number between " + MIN + " and " + MAX);
if (input == null) {
break;
}
if (input == "") {
alert("You didn't enter a number.");
}
else {
guess = parseInt(input);
guesses++;
if (guess != secretNumber) {
alert("Nope ... sorry!");
}
else {
switch (guesses) {
case 1:
alert("Well done! You got it first time!");
break;
case 2:
case 3:
alert("Not bad - you only needed " + guesses + " guesses.");
break;
case 4:
case 5:
case 6:
alert("Yes . . . you got there in the end!");
break;
default:
alert("Yes . . . finally!");
}
}
}
} while (guess != secretNumber);
}
</script>
</head>
<body>
<div class="center">
<h1>JavaScript Demo 12</h1>
<h2>Guess the Secret Number</h2>
<p>Click on the button below to start.</p>
<p><button onclick="playGame()">Play</button></p>
</div>
</body>
</html>
Copy and paste this code into a new file in your HTML editor, save the file as javascript-demo-12.html, and open the file in a web browser. You should see something like this:
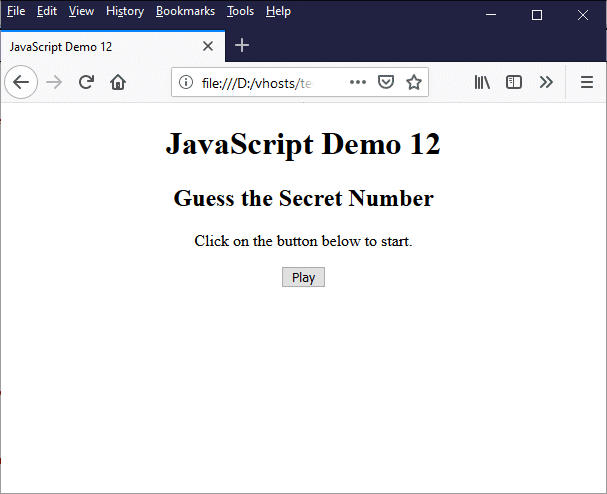
An HTML page that asks the user to play a simple guessing game
Click on the "Play" button to start the game. A dialog box will appear asking you to pick a number between one and fifteen.
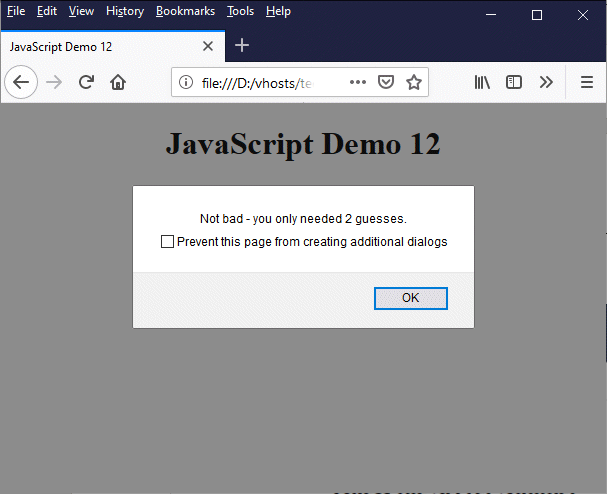
Once you guess the correct number, a message will be displayed
The dialog box is displayed initially because the code in the body of the do...while statement will always execute at least once. After that, the dialog box will be displayed repeatedly until the user guesses the secret number correctly, or until they click on the "Cancel" button. The do...while construct is quite useful in a situation like this, where we want to prompt a user for some input and evaluate the response before deciding whether to repeat the request.
Note that the JavaScript prompt() method is used to display a modal dialog box, with an optional message, that prompts the user to input something. We can use it if we want the user to input some text or a numeric value, as we have in this example. The method either returns the user input as a string, or null if the "Cancel" button is clicked.
break and continue
The break and continue statements both result in the termination of the current routine, be it a conditional control structure or a loop. We'll deal with each of these statements in turn, starting with break. The break statement allows you to break out of the current block of code and resume program execution at the first statement following that block. We have already seen how the break statement is used in a switch statement:
switch (expression) {
case value01:
// statement(s) to be executed
break;
case value02:
// statement(s) to be executed
break;
case value03:
// statement(s) to be executed
break;
.
.
.
.
.
.
case value10:
// statement(s) to be executed
vbreak;
default:
// statement(s) to be executed
}
The break statement enables us to terminate the switch statement once we have found a matching case for expression. This reduces the workload on the JavaScript interpreter, which would otherwise have to compare each of the remaining case values with expression, even though the switch statement has already accomplished its assigned task (there may be situations in which which we actually want the code to do this, but they are the exception rather than the rule).
We have also seen the break statement used several times, first to break out of a loop, and later within a switch statement, in our "Guess the Secret Number" script. Here is the code we used:
do {
let input = prompt("Please enter a number between " + MIN + " and " + MAX);
if (input == null) {
break;
}
if (input == "") {
alert("You didn't enter a number.");
}
else {
guess = parseInt(input);
guesses++;
if (guess != secretNumber) {
alert("Nope ... sorry!");
}
else {
switch (guesses) {
case 1:
alert("Well done! You got it first time!");
break;
case 2:
case 3:
alert("Not bad - you only needed " + guesses + " guesses.");
break;
case 4:
case 5:
case 6:
alert("Yes . . . you got there in the end!");
break;
default:
alert("Yes . . . finally!");
}
}
}
} while (guess != secretNumber);
In this case, the break statement within the switch statement only terminates the execution of the switch statement, whereas the break statement inside the first if statement will cause program execution to exit the do...while loop altogether. You can also use break with a label that causes program execution to break out of the code block identified by the label. The following HTML code creates a web page that demonstrates the use of a label:
<!doctype html>
<html lang="en">
<head>
<meta charset="utf-8">
<title>JavaScript Demo 13</title>
<style>
.center { text-align: center; }
p {
margin: 1em 0;
text-align: left;
vdisplay: inline-block;
}
</style>
<script>
function randomOutput() {
let outputContainer = document.getElementById("output");
let output = "";
let randomNum = Math.floor(Math.random() * 10) + 1;
output = "<p>";
outputLoop:
for (let i = 1; i < 11; i++) {
if (i == randomNum) {
output += "Output has stopped at " + i + ".</p>";
outputContainer.innerHTML = output;
break outputLoop;
}
output += "Output has reached " + i + ".<br>";
}
}
</script>
</head>
<body onload="randomOutput()">
<div class="center">
<h1>JavaScript Demo 13</h1>
<h2>Using Labels</h2>
<div id="output"></div>
</div>
</body>
</html>
Copy and paste this code into a new file in your HTML editor, save the file as javascript-demo-13.html, and open the file in a web browser. You should see something like this:
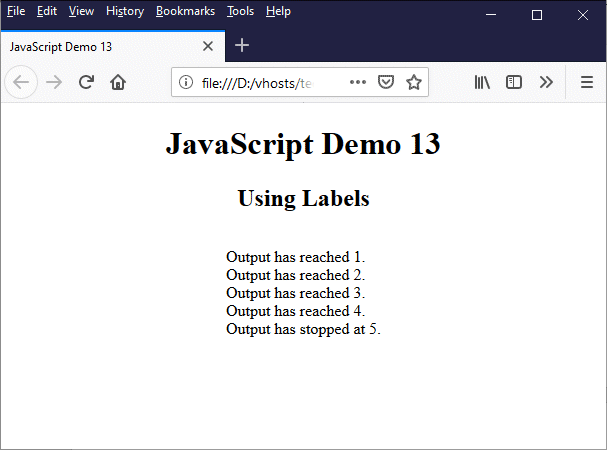
This HTML page uses break with a label to jump out of a loop
If you hit the browser's "Reload" button a few times you should see that the the number of lines of text output will vary between one and ten. We should probably point at at this point that the use of a label to achieve this outcome is completely unnecessary; we just used it to illustrate how a label might be used.
Labels should be used with care, and only when necessary, since they can make your code harder to follow; there is usually a better way of doing something. In the above example, we could use the break statement without the label; the result would be exactly the same.
Where labels are sometimes quite useful is when we are in an inner loop (i.e. a loop within a loop) and wish to jump out of the outer loop. We could identify the outer loop with a label, and use a break statement with that label to jump out of the outer loop. A break statement on its own (i.e. without a label) will only jump out of the inner loop.
The next statement we want to look at is the continue statement. A continue statement can appear within a for loop, a while loop or a do...while loop. It is used to skip the current iteration of a loop and continue program execution with the next iteration of the loop, assuming there is one (otherwise, it will simply exit the loop).
The following HTML code creates a web page similar to the previous example, except that this time, instead of using a randomly generated number to determine the number of lines of text to be output, we use the random number to pick one line to omit from the output. This example also uses a label, just to demonstrate that labels can also be used with a continue statement. Here is the code:
<!doctype html>
<html lang="en">
<head>
<meta charset="utf-8">
<title>JavaScript Demo 14</title>
<style>
.center { text-align: center; }
p {
margin: 1em 0;
text-align: left;
display: inline-block;
}
</style>
<script>
function randomOutput() {
let outputContainer = document.getElementById("output");
let output = "";
let randomNum = Math.floor(Math.random() * 10) + 1;
output = "<p>";v
outputLoop:
for (let i = 1; i < 11; i++) {
if (i == randomNum) {
continue outputLoop;
}
output += "Output has reached " + i + ".<br>";
}
output += "<br>(Output line " + randomNum + " was omitted).</p>";
outputContainer.innerHTML = output;
}
</script>
</head>
<body onload="randomOutput()">
<div class="center">
<h1>JavaScript Demo 14</h1>
<h2>Using Labels</h2>
<div id="output"></div>
</div>
</body>
</html>
Copy and paste this code into a new file in your HTML editor, save the file as javascript-demo-14.html, and open the file in a web browser. You should see something like this:
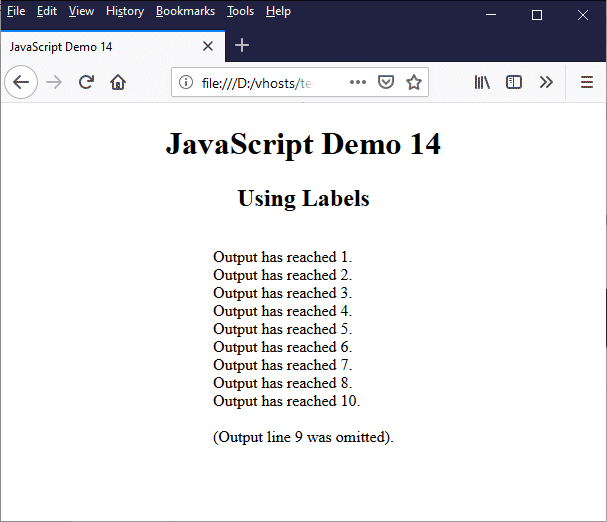
This HTML page uses continue with a label to skip one iteration of a loop
If you hit the browser's "Reload" button a few times you should see that the the number of lines of text output will always be nine, but in each case one line of output will have been omitted (the line to be omitted is randomly chosen). Once again, we should point out that the use of a label is not necessary to achieve this outcome, and we could safely remove any reference to it from our code.
Nested control structures
Nested control structures are control structures inside other control structures. In theory, there is no limit to how many levels we can use to nest control structures, but it is unusual to see more than two or three levels of nesting. When it comes to nested control structures, there are many possible permutations. We have already seen some of them. In the example we used to demonstrate the the use of the hasOwnProperty() method with the for...in loop (see above), we saw this code:
for (property in myTriangle) {
propertiesTable += "<tr><td class='left'>" + property + "</td>";
propertiesTable += "<td>" + myTriangle[property] + "</td>";
propertiesTable += "<td>";
if (myTriangle.hasOwnProperty(property)) {
propertiesTable += "No";
}
else {
propertiesTable += "Yes";
}
propertiesTable += "</td></tr>";
}
Here, we see an if...else conditional statement nested inside a for loop. Our chess board layout example also has a nested if...else statement and a simple if statement nested within a while loop:
while (i < 64) {
if (!chessSymbol[i]) {
chessBoard += "<td></td>";
}
else {
chessBoard += "<td>" + chessSymbol[i] + "</td>";
}
if ((i + 1) % 8 === 0) {
chessBoard += "</tr><tr>";
}
i++;
}
You can no doubt find other examples in the sample code provided in this page. One of the most frequently encountered problems in programming in general is how to sort a list of items. One of the techniques often used to solve this problem is something called a bubble sort. The bubble sort is a relatively simple algorithm that steps through the list, compares adjacent list elements and swaps them around if they are not already in the right order. The process is repeated multiple times until the list is sorted.
The HTML code below creates a web page that displays a list of car manufacturers in random (non-alphabetical order, and a button that, when clicked, causes the list to be sorted and re-displayed, this time in alphabetical order. Here is the code:
<!doctype html>
<html lang="en">
<head>
<meta charset="utf-8">
<title>JavaScript Demo 15</title>
<style>
.center { text-align: center; }
p {
text-align: left;
display: inline-block;
margin: 1em auto;
}
</style>
<script>
let carMfrs = ["Saab", "Volvo", "BMW", "Ford", "Vauxhall", "Citroen", "Fiat", "Audi", "Volkswagen", "Mercedes", "Honda"];
function populateList() {
let list = "";
for (let i = 0; i < carMfrs.length; i++) {
list += (carMfrs[i] + "<br>");
}
document.getElementById("list").innerHTML = list;
}
function bubbleSort(list){
let sorted, temp;
let n = list.length-1;
let newList = Array.from(list);
do{
sorted = false;
for(let i = 0; i < n; i++) {
if (newList[i+1].localeCompare(newList[i]) === -1) {
temp = newList[i+1];
newList[i+1] = newList[i];
newList[i] = temp;
sorted = true;
}
}
}
while(sorted);
return newList;
}
function displaySorted() {
let carMfrsSorted = Array.from(bubbleSort(carMfrs));
let outputList = "";
for (let i = 0; i < carMfrsSorted.length; i++) {
outputList += (carMfrsSorted[i] + "<br>");
}
document.getElementById("list").innerHTML = outputList;
}
</script>
</head>
<body onload="populateList()">
<div class="center">
<h1>JavaScript Demo 15</h1>
<h2>A Bubble Sort Script</h2>
<p>Here is a list of car manufacturers:</p>
<div>
<p id="list"></p>
</div>
<button onClick="displaySorted()">Click to Sort List</button>
</div>
</body>
</html>
Copy and paste this code into a new file in your HTML editor, save the file as javascript-demo-15.html, and open the file in a web browser. You should see something like this:
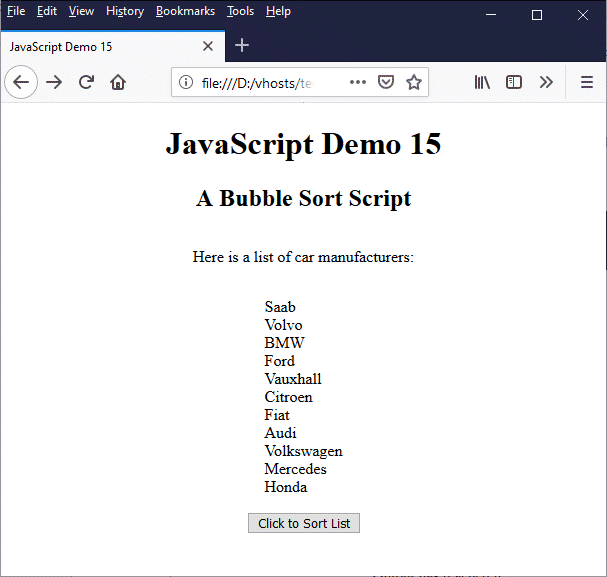
This HTML page displays an unsorted list of car manufacturers
If you click on the "Click to Sort List" button, the list of car manufacturers will be sorted alphabetically, and the revised list will replace the current one.
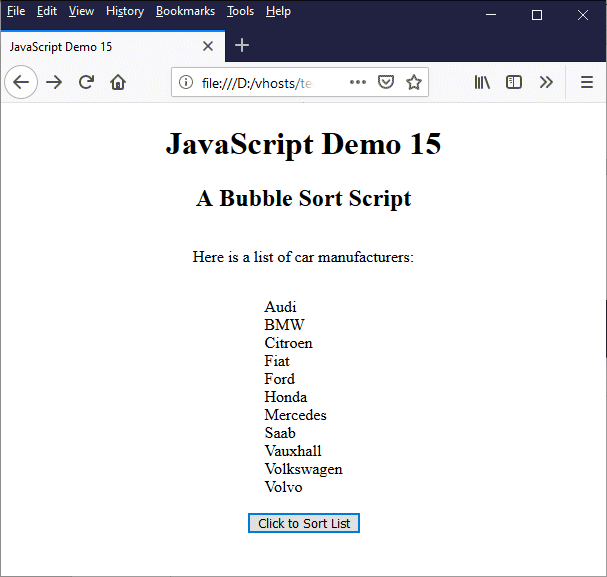
The page now displays the list of car manufacturers in alphabetical order
The JavaScript code in this example revolves around three functions. The first function, populateList(), takes the contents of an array containing the names of varous car manufacturers, in no particular order, adds then to a text string containing the appropriate HTML markup elements, and assigns that text string as the inner HTML of an empty paragraph element.
Another function, displaySorted(), takes the contents of another array consisting of the alphabetically sorted elements from the first array, adds them to another text string along with the appropriate HTML markup, and assigns that text string as the inner HTML of the same paragraph element, replacing the unsorted list of car manufacturer with the sorted list.
The question is, how did we get our sorted array? The real magic is done by a third function, bubbleSort(), that takes the name of an array as its argument and sorts the contents alphabetically. The bubbleSort() function is called by the displaySorted() function to sort the original list of car manufactures.
You don't really need to understand exactly how a bubble sort works at this stage; suffice to say it uses a simple and not particularly efficient algorithm for sorting, but it's perfectly adequate for our purposes.
The interesting thing to note here is that it uses two loops: a for loop and a do...while loop. The for loop is nested within the do...while loop, and itself hosts a nested if statement. Here is the code for the bubbleSort() function once more:
function bubbleSort(list){
let sorted, temp;
let n = list.length-1;
let newList = Array.from(list);
do{
sorted = false;
for(let i = 0; i < n; i++) {
if (newList[i+1].localeCompare(newList[i]) === -1) {
temp = newList[i+1];
newList[i+1] = newList[i];
newList[i] = temp;
sorted = true;
}
}
}
while(sorted);
return newList;
}
You may be wondering why we use the Array.from() method here. Couldn't we have simply assigned the value of list to newList? Unfortunately, no. If you attempt to assign the value of an array to a variable using simple assignment, what you are actually doing is passing a reference to the array to that variable which points to the original array. Changes made to the "new" array will, in fact, be changes to the original array.
Another reason for using the Array.from() method is that it will accept a reference to any array-like or iterable object as its argument, and create a new array. This makes our bubble sort quite versatile, because its use is not restricted solely to arrays.
