| Author: | |
| Website: | |
| Page title: | |
| URL: | |
| Published: | |
| Last revised: | |
| Accessed: |
The Timer is a built-in Visual Basic control that allows you to execute code after a specific amount of time has elapsed from the moment at which the timer is enabled, or repeatedly at specific time intervals. Once enabled, the timer will generate a Tick event at predetermined intervals.
The time that elapses between ticks is specified by the Timer object's Interval property, which can be set at design time or programmatically. The length of the interval is specified in milliseconds (a millisecond is one thousandth of a second, or 0.001 seconds). The default interval is 100 milliseconds, but the range of possible values is 1 to 2,147,483,647.
A timer is typically used in a Visual Basic program by creating an event handler for its Tick event (the event handler contains code that will be executed when a Tick event occurs). The event handler's code will only execute if the Timer object is enabled. The timer is enabled by setting its Enabled property to True, either programmatically or at design time.
When a Timer object is first added to a form, the Enabled property is set to False by default. The Timer object has a Start() method that sets its Enabled property to True, and a Stop() method that sets the Enabled property to False.
The Timer object does not actually appear on the form itself, either in design mode or when debugging / executing the program. It is only visible in the Component Tray (the grey area at the bottom of the form design window). We will create a simple clock-calendar program to demonstrate how the timer may be used.
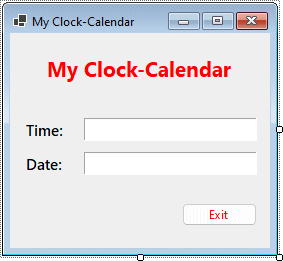
The clock-calendar interface
| Control | Name |
|---|---|
| Form | frmClockCalendar |
| Top label | lblCurrentTime |
| Bottom label | lblCurrentDate |
| Button | cmdExit |
| Timer | tmrClock |
End
lblCurrentTime.Text = Format(Now, "Long Time")
lblCurrentDate.Text = Format(Now, "Long Date")
lblCurrentTime.Text = Format(Now, "Long Time")
lblCurrentDate.Text = Format(Now, "Long Date")
Run the application and you should see the correct time and date (see the illustration below). The code we added to the Tick event will cause the time and date information to be updated once every second.
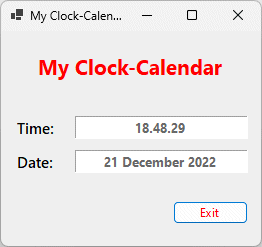
The clock-calendar shows the current time and date
The Clock-Calendar application is a somewhat trivial example of how a timer is used in an application, but there are many examples in our everyday lives of real-world situations in which timers perform a crucial role. The wash-cycle of a washing machine is one example of a process that is controlled by a timer. Automatic doors in buildings are also controlled by timers (if their proximity sensors do not detect a person in close proximity to the doors, they will automatically close themselves after a predetermined interval).
Perhaps one of the most ubiquitous examples of how timers impact on our daily life, whether we use a vehicle to get from place to place or travel on foot, is the traffic light. The timing circuits on a set of traffic lights must function perfectly, or there is a good chance of an accident occurring! We will now create a simulation to demonstrate how timers might be used to control a set of four traffic lights at a small crossroads. One of the two intersecting roads runs from North to South, while the other runs from East to West.
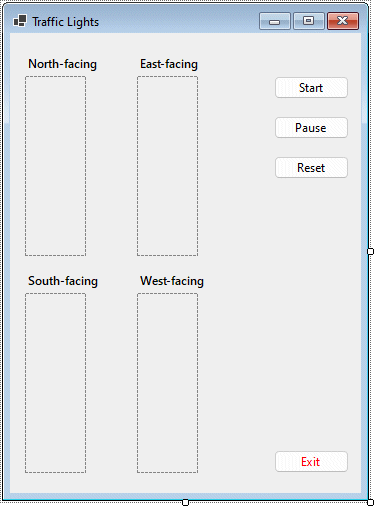
The Traffic Light program interface
| Control | Name |
|---|---|
| Form | frmTrafficLights |
| Button1 | cmdStart |
| Button2 | cmdPause |
| Button3 | cmdReset |
| Button4 | cmdExit |
| PictureBox1 | picNorth |
| PictureBox2 | picSouth |
| PictureBox3 | picEast |
| PictureBox4 | picWest |
Download the images here.
Add resources to the project by editing the Resources.resx file
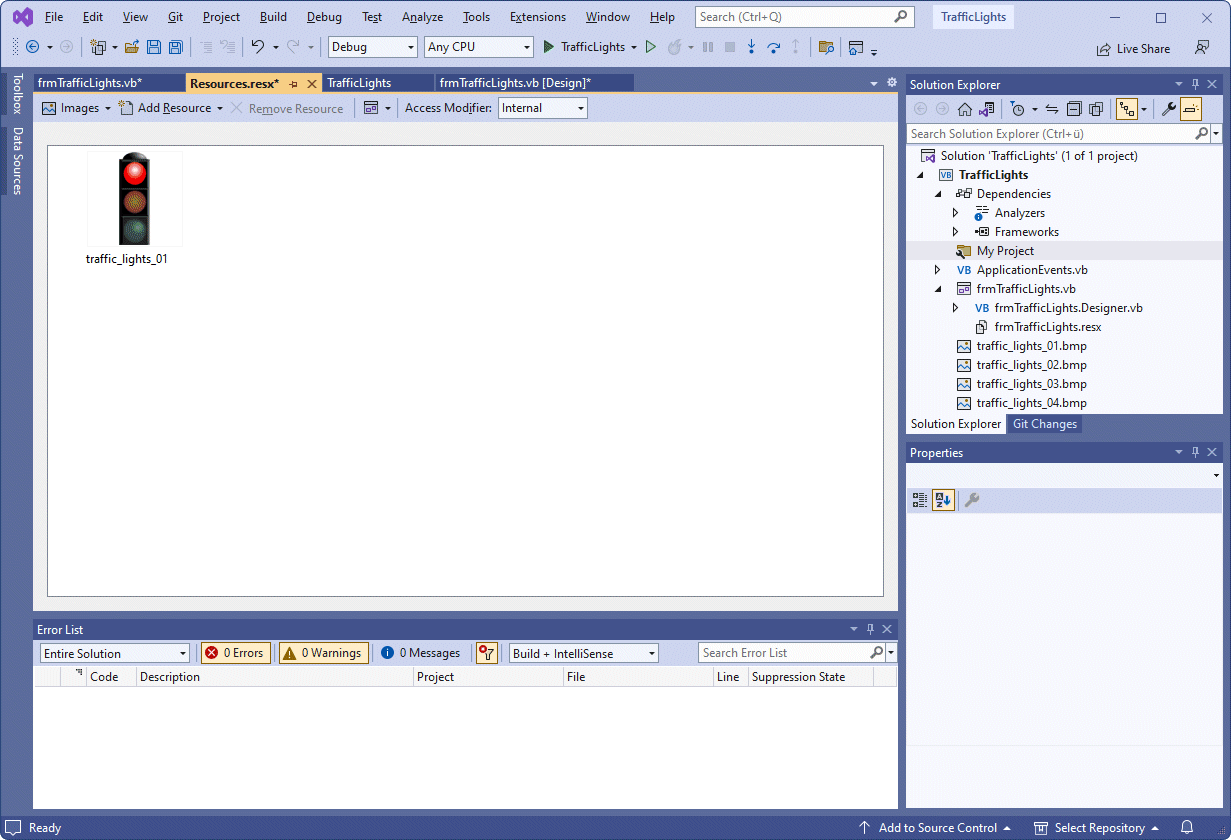
The first image file has been added to the project's resources
picNorth.Image = My.Resources.traffic_lights_01
picSouth.Image = My.Resources.traffic_lights_01
picEast.Image = My.Resources.traffic_lights_01
picWest.Image = My.Resources.traffic_lights_01
cmdPause.Enabled = False
cmdReset.Enabled = False
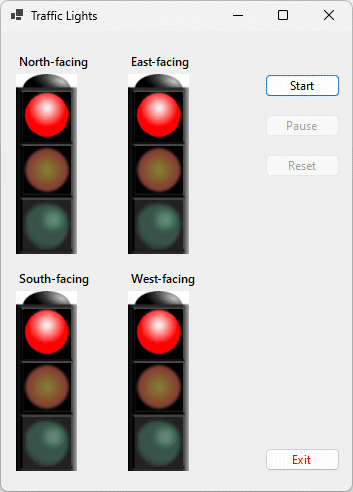
The TrafficLight application screen
In their initial state, both pairs of traffic lights (North-South and East-West) are set to Red. This is the default condition and means that no traffic will be moving initially. The normal sequence for traffic lights is Red (stop), Red and Amber (get ready), Green (go), Amber (prepare to stop) and Red (stop) once more.
While one pair of lights goes through this sequence, the other pair must remain on Red to ensure that traffic flows across the intersection from North to South and vice versa, or from East to West and vice versa, but not both at the same time. In real life, the timing used can vary from one set of traffic lights to another depending on the amount of traffic that goes through the intersection on a daily basis, on the time of day (since traffic flows can vary considerably throughout the day), and on the day of the week (weekdays are often busier than weekends).
For the purposes of this application we will assume that there is a uniform flow of traffic through the intersection in all four directions. Each pair of traffic lights will be sequenced as follows:
Although the order is not particularly important, we will start proceedings with the North-South pair of lights. When this pair of lights has completed one cycle, during which the East-West pair will remain in the Red condition, it will return itself to the Red condition. The East-West pair of lights will then commence its own cycle, during which the North-South pair of lights will remain in the Red condition. The entire sequence is then repeated.
The simulation is achieved by changing the images displayed by each PictureBox object as required in order to reflect the current status of each pair of lights. Since a timer simply "ticks" at pre-determined intervals and does not actually keep track of how many times it has ticked, we need to create variables to store this information.
Dim NSCount, EWCount As Integer
NSCount = 0
EWCount = 0
If NSCount = 0 And EWCount = 0 Then
tmrNS.Start()
ElseIf NSCount > 0 Then
tmrNS.Start()
Else
tmrEW.Start()
End If
cmdPause.Enabled = True
cmdReset.Enabled = True
cmdStart.Enabled = False
NSCount += 1
If NSCount = 3 Then
picNorth.Image = My.Resources.traffic_lights_02
picSouth.Image = My.Resources.traffic_lights_02
ElseIf NSCount = 6 Then
picNorth.Image = My.Resources.traffic_lights_03
picSouth.Image = My.Resources.traffic_lights_03
ElseIf NSCount = 16 Then
picNorth.Image = My.Resources.traffic_lights_04
picSouth.Image = My.Resources.traffic_lights_04
ElseIf NSCount = 19 Then
picNorth.Image = My.Resources.traffic_lights_01
picSouth.Image = My.Resources.traffic_lights_01
NSCount = 0
tmrNS.Stop ()
tmrEW.Start ()
End If
Clicking the Start button sets the Enabled property of tmrNS or tmrEW to True. Which timer is started depends on whether this is a new start, or whether the program is already running. If the program is running but has been paused, the code must determine which timer was last active.
When a timer is enabled, the Tick event handler will execute once for each time interval of 1000 milliseconds (1 second). It also enables the Pause and Reset buttons, and disables the Start button. The variable NSCount is incremented by one each time this code is executed. When the value of NSCount reaches 3 (a condition checked for by the first If statement), the existing images for picNorth and picSouth (showing the traffic lights in the Red condition) are swapped for copies of images showing the traffic lights in the Red and Amber condition.
The code within the second If statement is triggered when NSCount reaches 6, replacing the Red and Amber traffic lights with Green traffic lights. The third If statement is activated when NSCount reaches 16 and changes the traffic light images to Amber.
The last If statement is activated when NSCount reaches 19, and restores the Red traffic light images. It also resets NSCount to 0, disables tmrNS (by calling its stop() procedure), and enables tmrEW (by calling its start() procedure) .
EWCount += 1
If EWCount = 3 Then
picEast.Image = My.Resources.traffic_lights_02
picWest.Image = My.Resources.traffic_lights_02
ElseIf EWCount = 6 Then
picEast.Image = My.Resources.traffic_lights_03
picWest.Image = My.Resources.traffic_lights_03
ElseIf EWCount = 16 Then
picEast.Image = My.Resources.traffic_lights_04
picWest.Image = My.Resources.traffic_lights_04
ElseIf EWCount = 19 Then
picEast.Image = My.Resources.traffic_lights_01
picWest.Image = My.Resources.traffic_lights_01
EWCount = 0
tmrEW.Stop ()
tmrNS.Start ()
End If
If NSCount > 0 Then
tmrNS.Stop ()
cmdPause.Enabled = False
cmdStart.Enabled = True
ElseIf EWCount > 0 Then
tmrEW.Stop ()
cmdPause.Enabled = False
cmdStart.Enabled = True
End If
picNorth.Image = My.Resources.traffic_lights_01
picSouth.Image = My.Resources.traffic_lights_01
picEast.Image = My.Resources.traffic_lights_01
picWest.Image = My.Resources.traffic_lights_01
tmrNS.Enabled = False
tmrEW.Enabled = False
NSCount = 0
EWCount = 0
cmdPause.Enabled = False
cmdReset.Enabled = False
cmdStart.Enabled = True
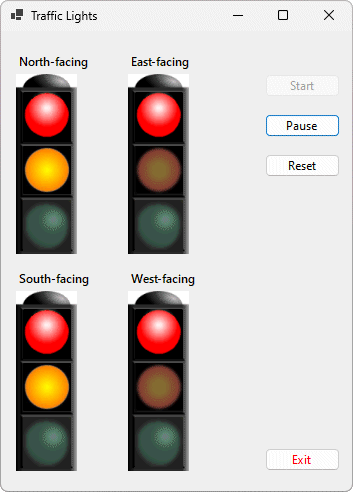
The TrafficLight application in operation